



To build our AI chatbot, we’ll use a tool called Chatbase.
Chatbase is one of the best chatbot platforms for building an AI chatbot.
You train it on your own data — like your website or documents — and it automatically answers questions about that data.
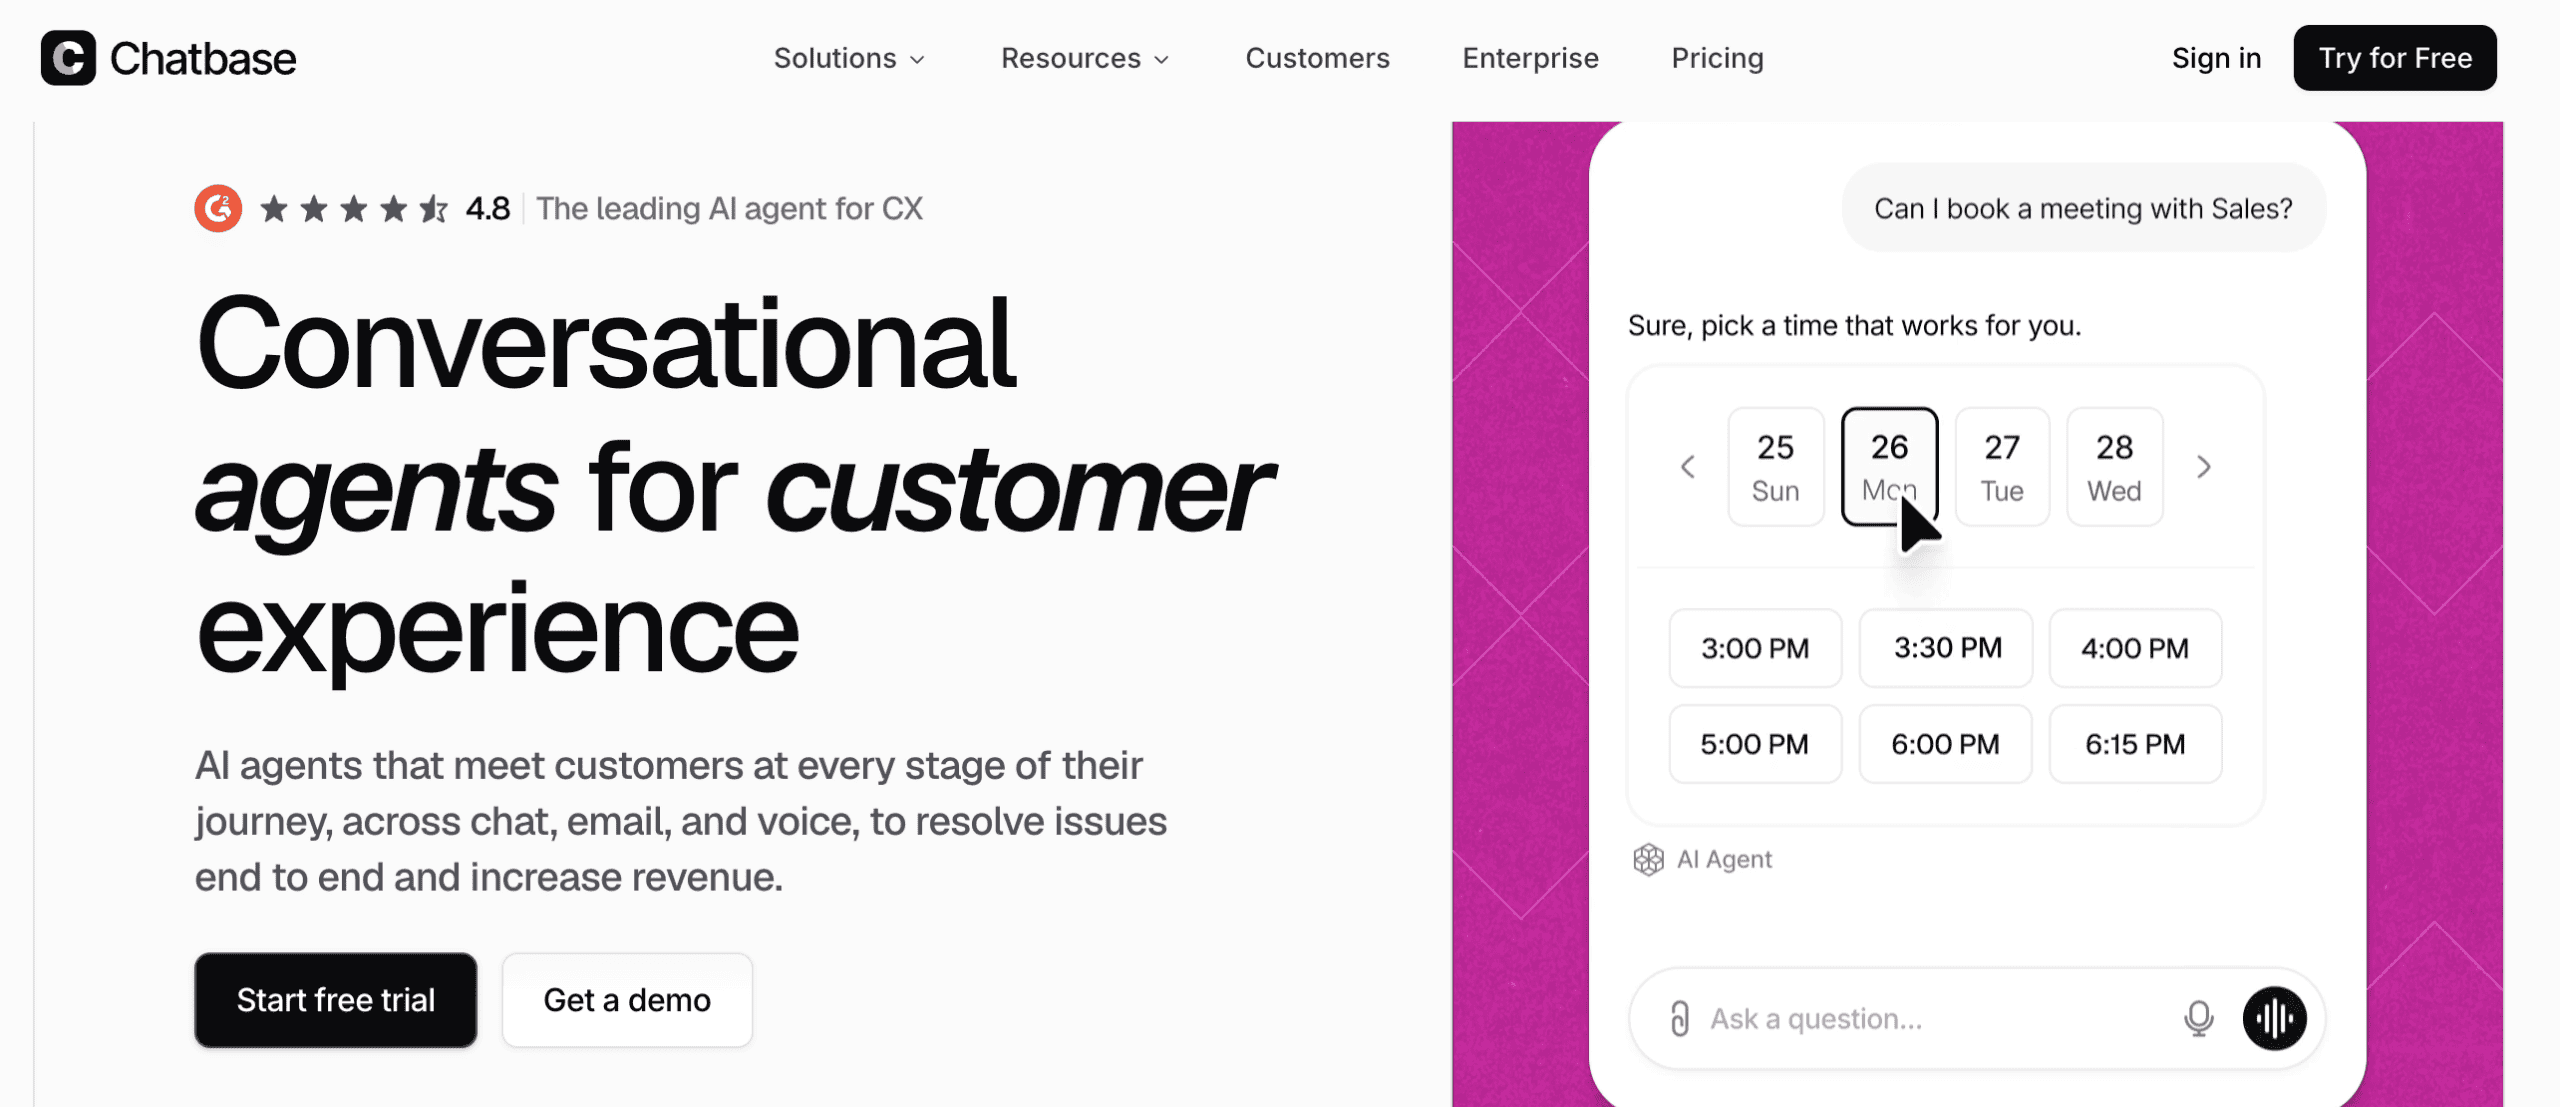
What makes Chatbase stand out is how fast you can set it up. You can have a working chatbot trained on your website within minutes.
It also solves the biggest problem with AI chatbots: wrong answers.
AI can make mistakes, but with Chatbase you can improve any answers manually. Then, it learns from your changes, so it improves over time.
Creating an AI chatbot with Chatbase is simple. Here’s how you can do it in 2 steps:
Let’s go through them one by one.
Step 1: Create your free Chatbase account
The first step is to create your Chatbase account. To do this, click the button below:
Create a free Chatbase account
This brings you to the Chatbase website, where you can click Start free trial:
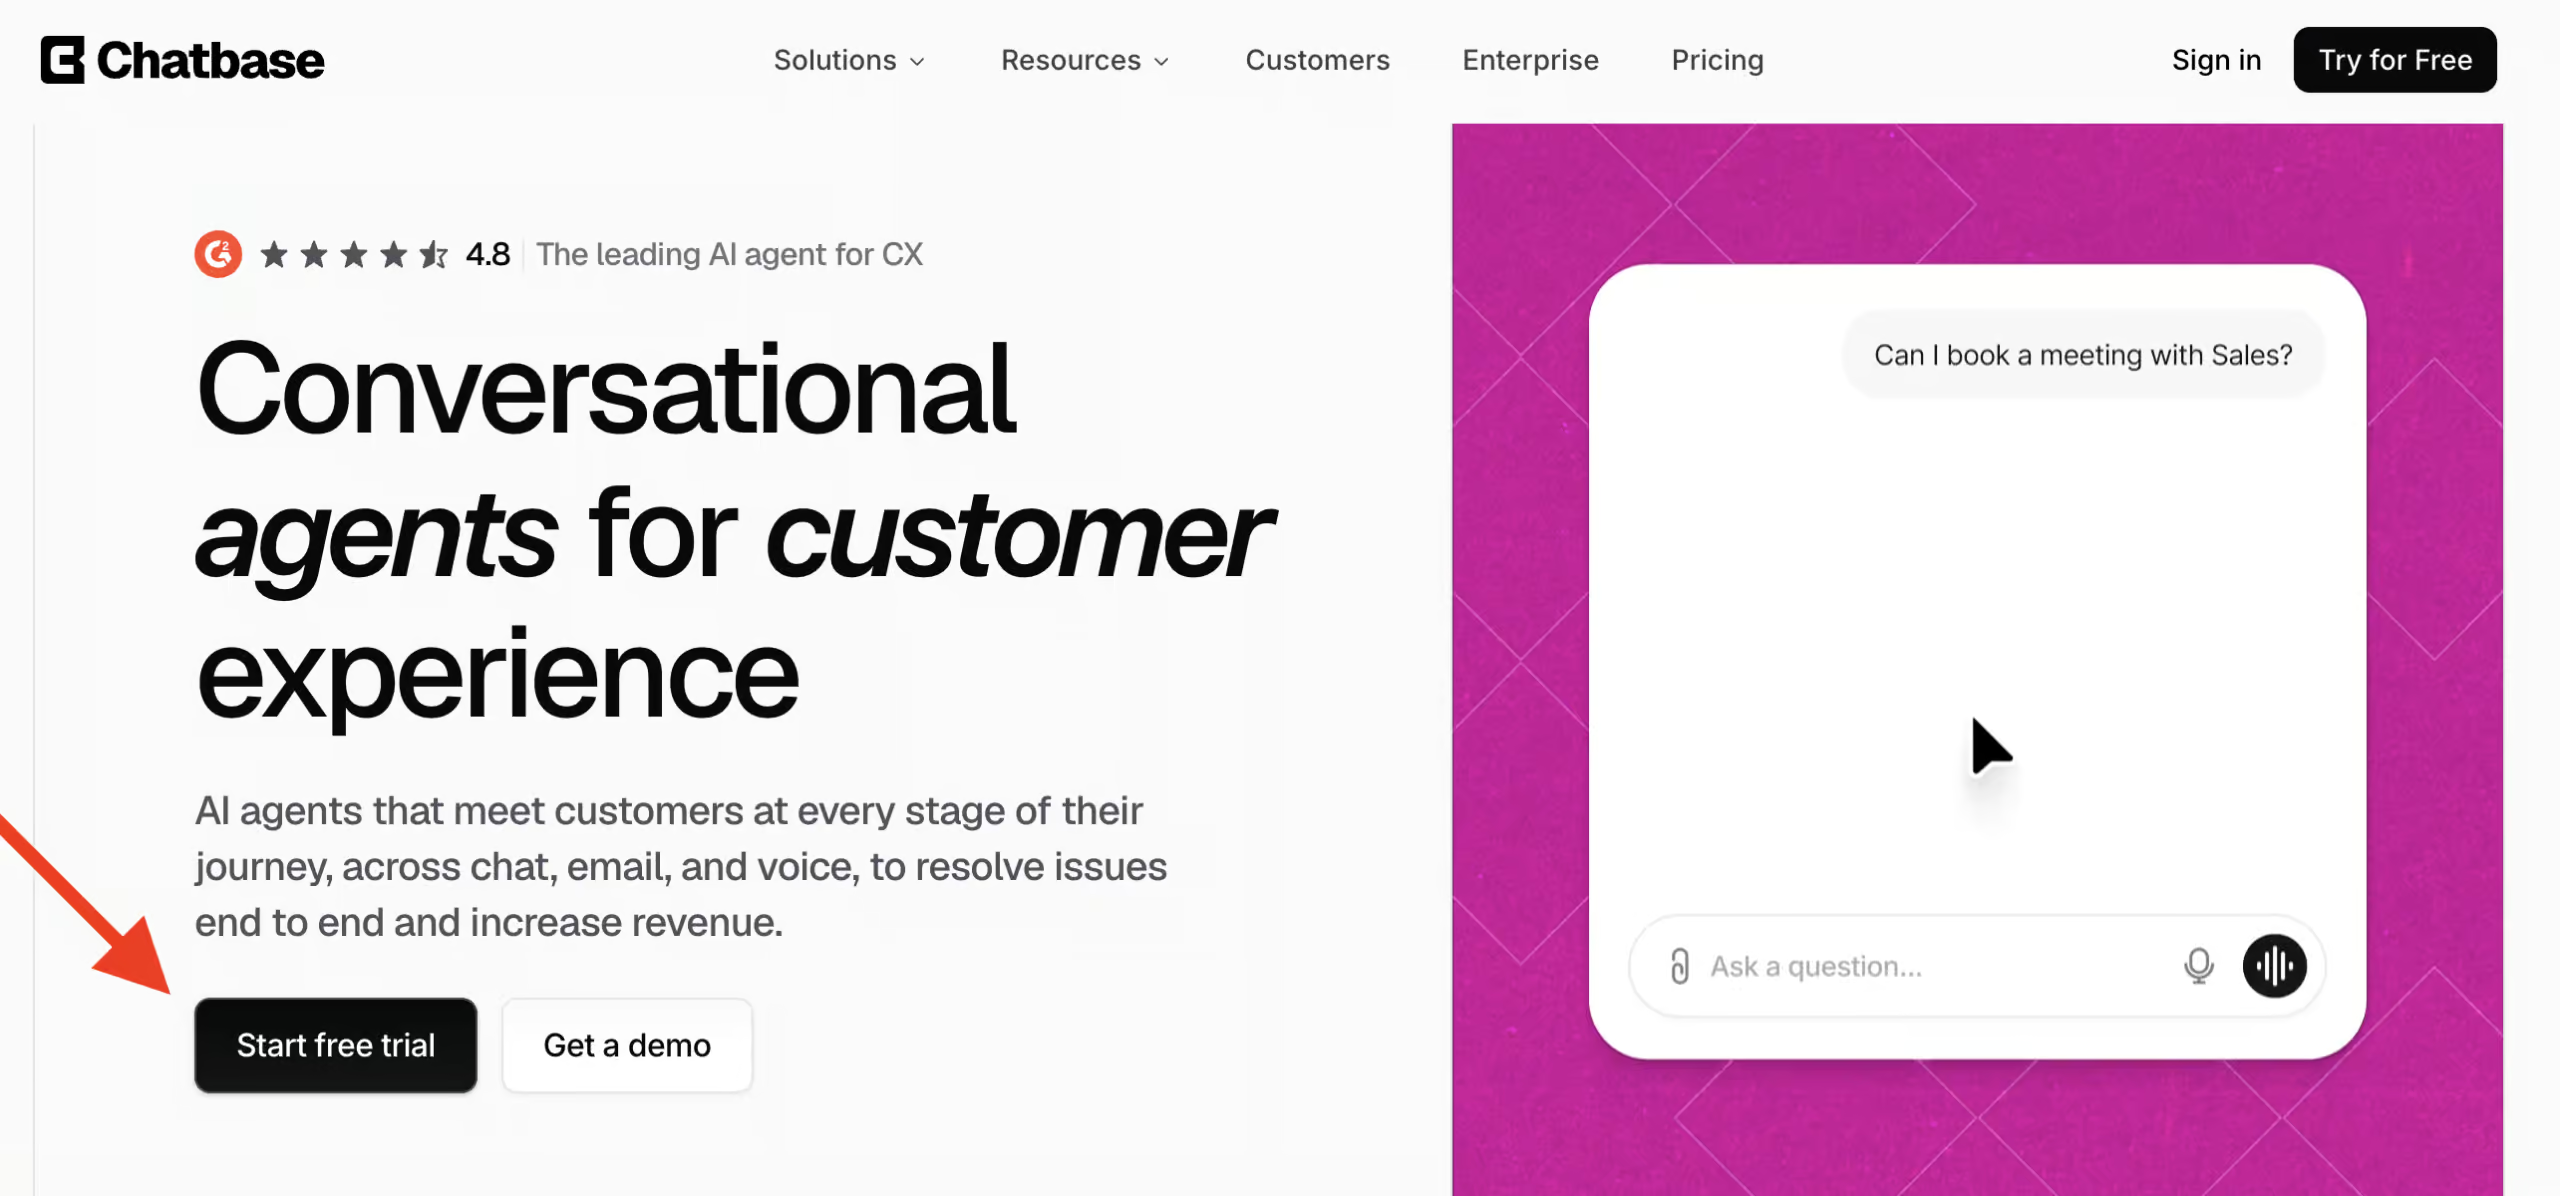
Chatbase has a free plan, so you can test the platform first. Once you’re ready to use it for your business, their paid plan starts at $40/month.
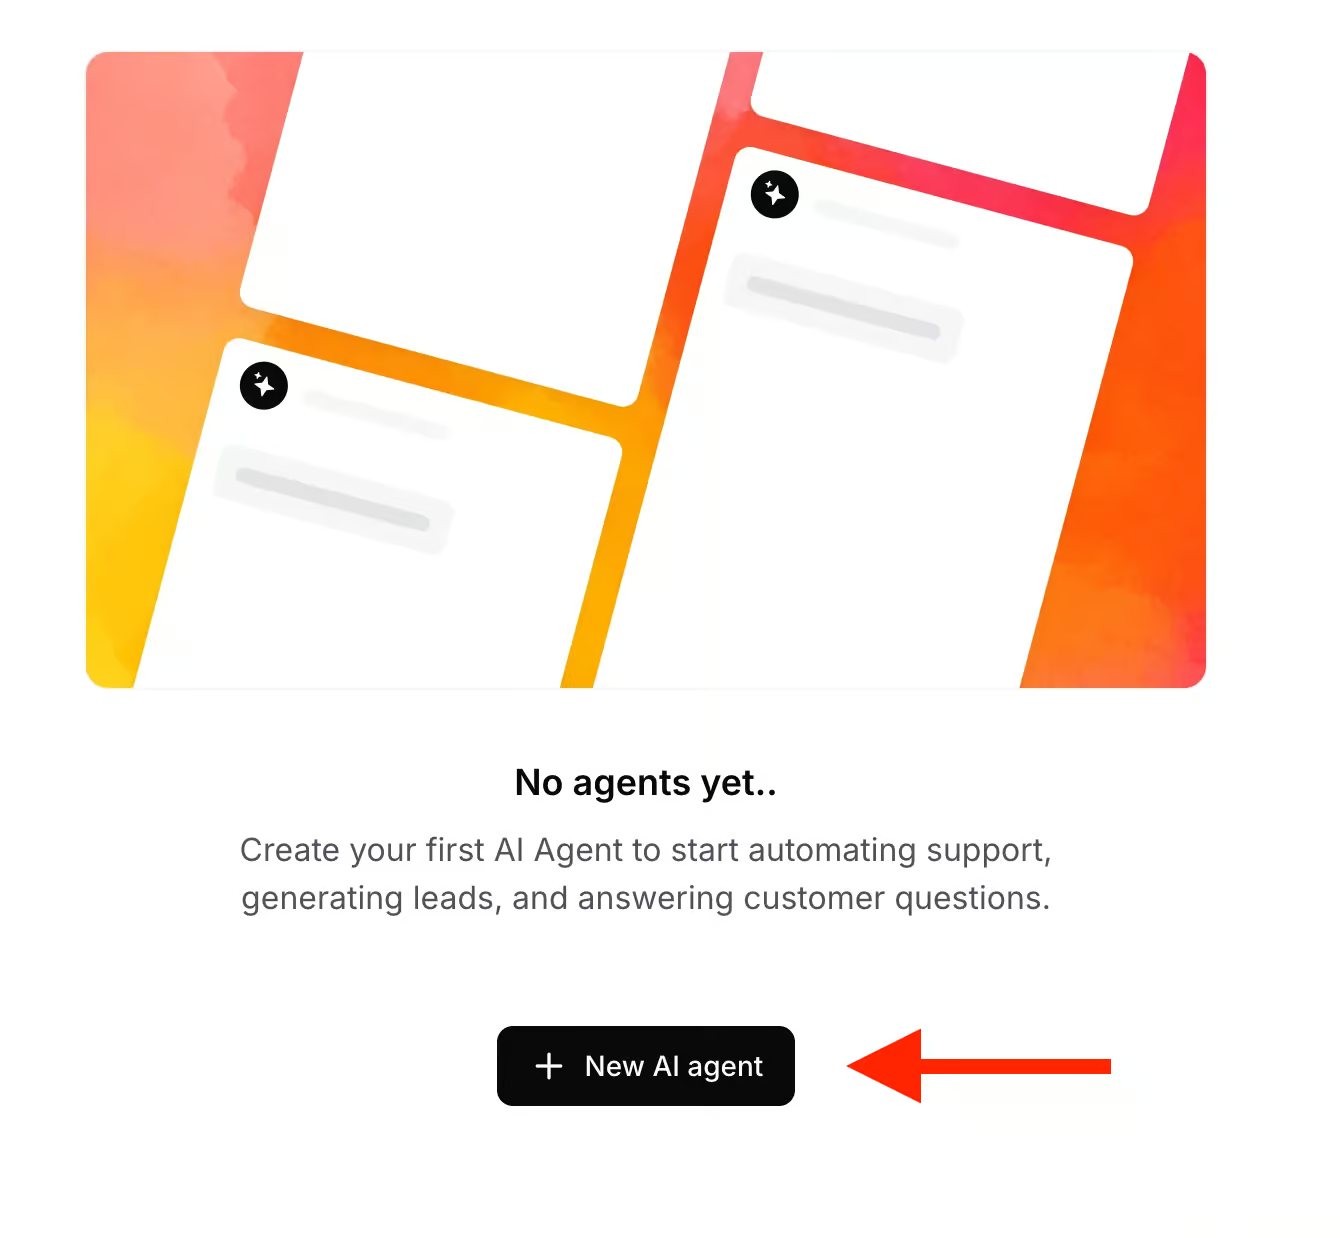
After you’re logged in, click New Agent to get started:
Step 2: Create and train your AI agent
Now we’ll create the agent and train it on your data.
First, you choose what to train your agent on. With Chatbase, you can train on a mix of sources:
- Files
- Text
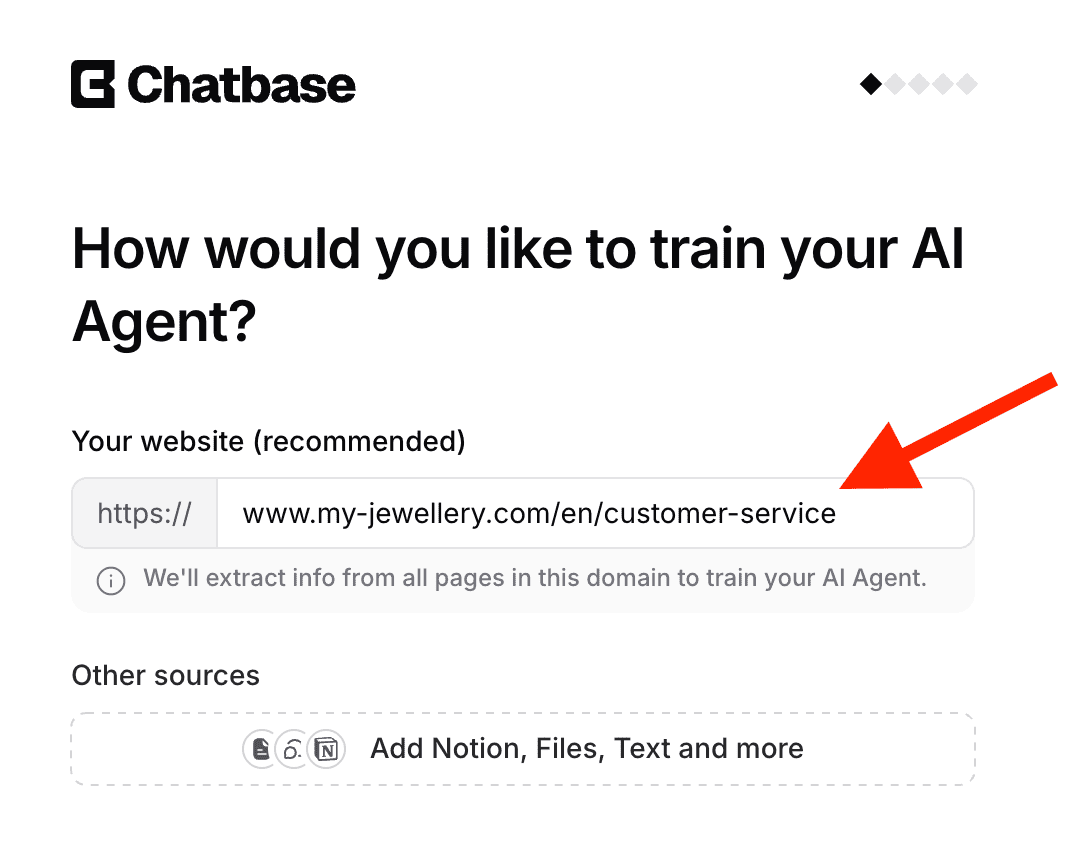
- Website
- Q&A
- Notion
For this tutorial, I’ll use My Jewellery as an example. My Jewellery is a internationnal eCommerce brand that sells jewellery and clothing.
Just like most eCommerce businesses, My Jewellery has a customer service page:
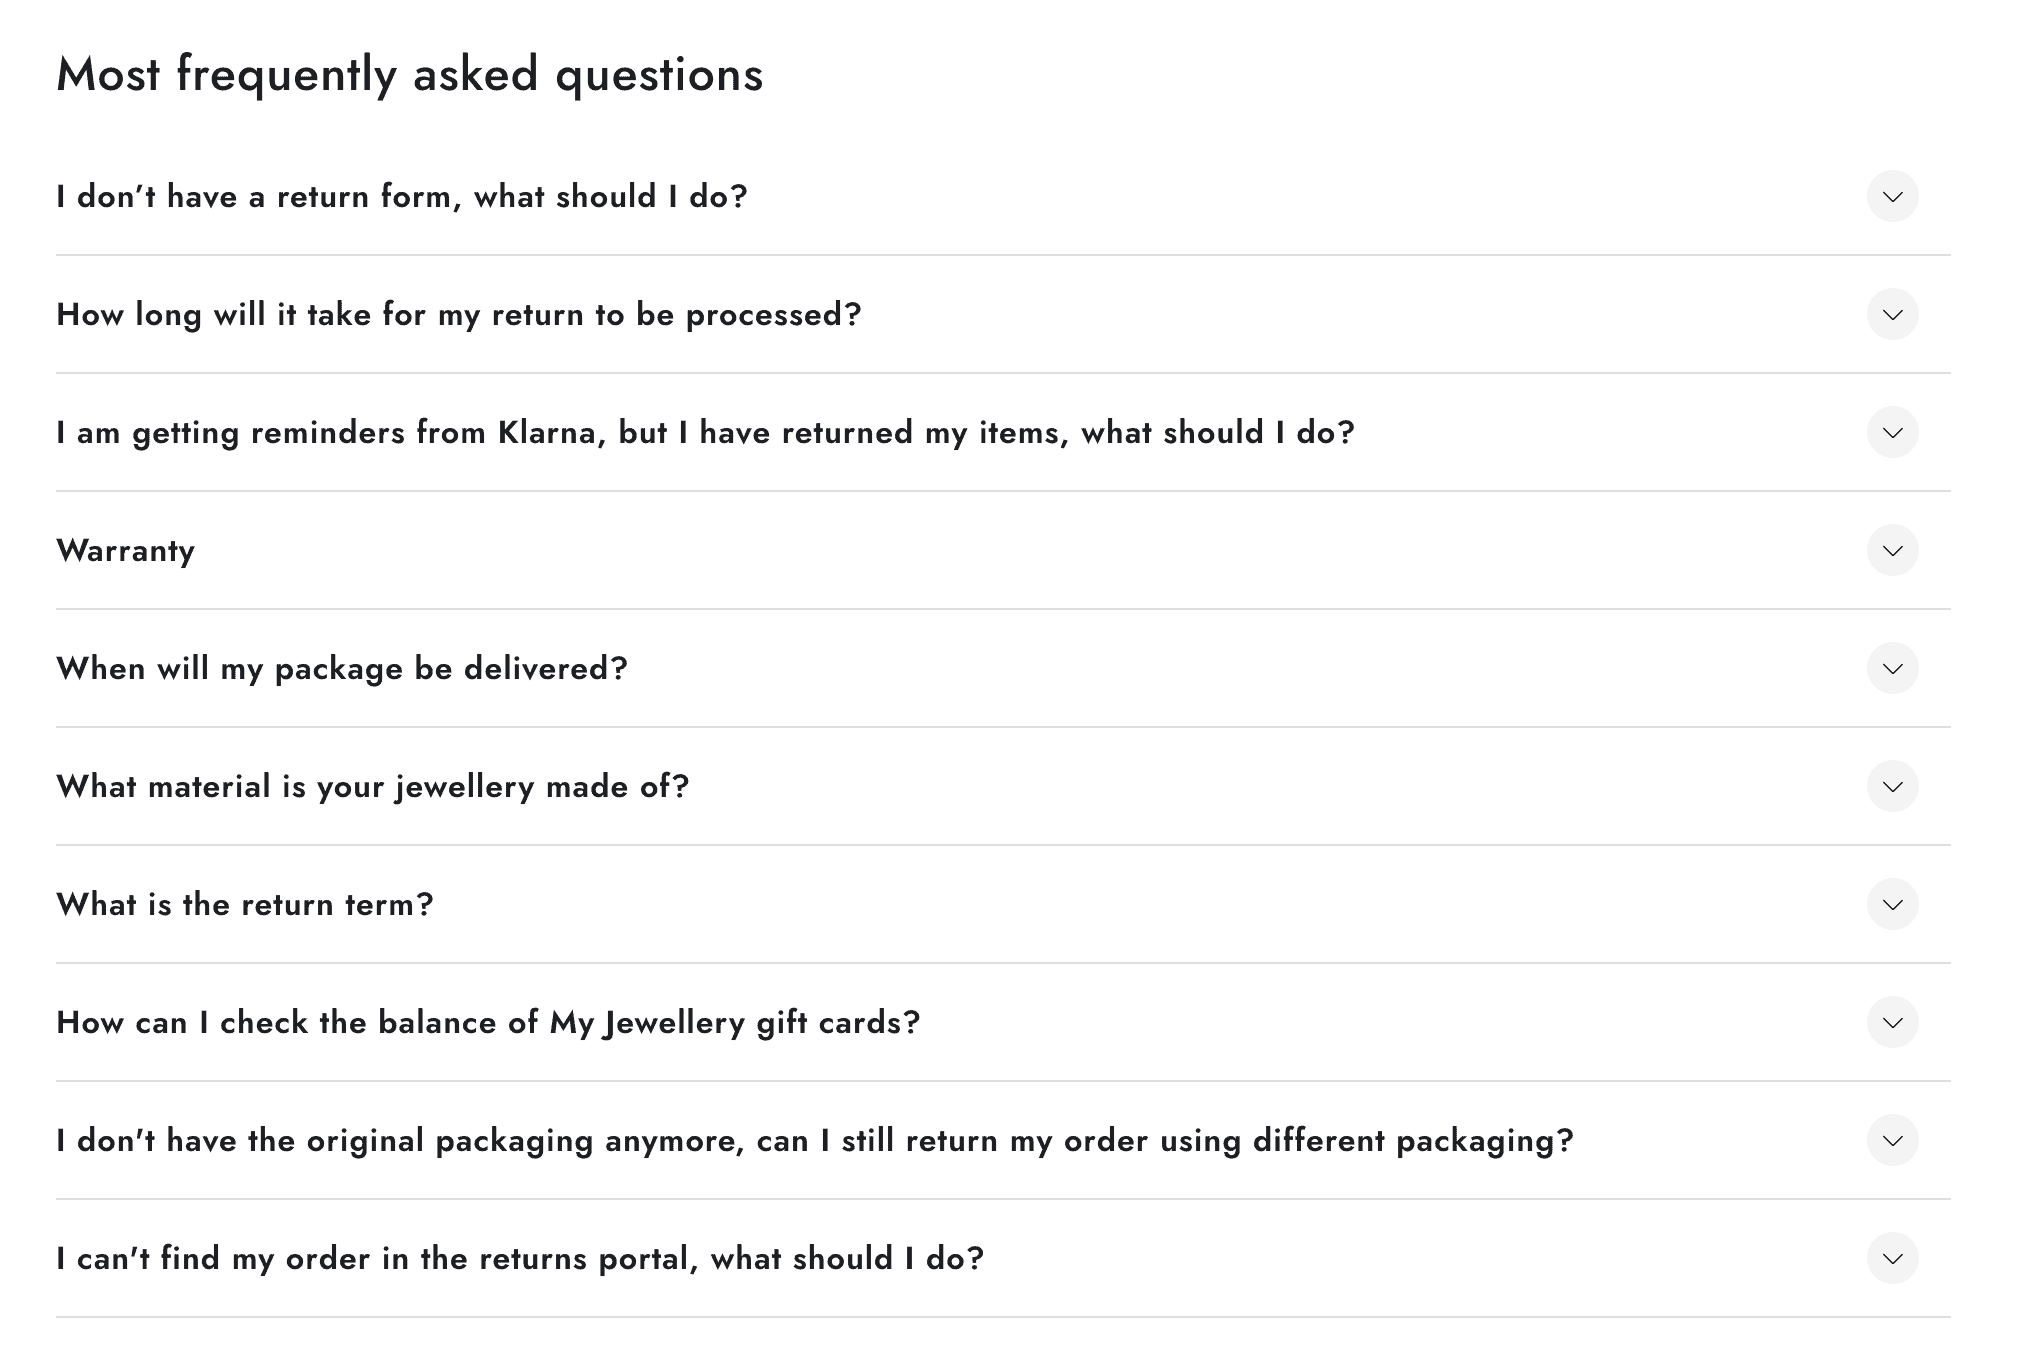
This page has many frequently asked questions about delivery times, returns, payments, and more. It’s ideal for training our chatbot.
So we grab the URL of that customer service page:
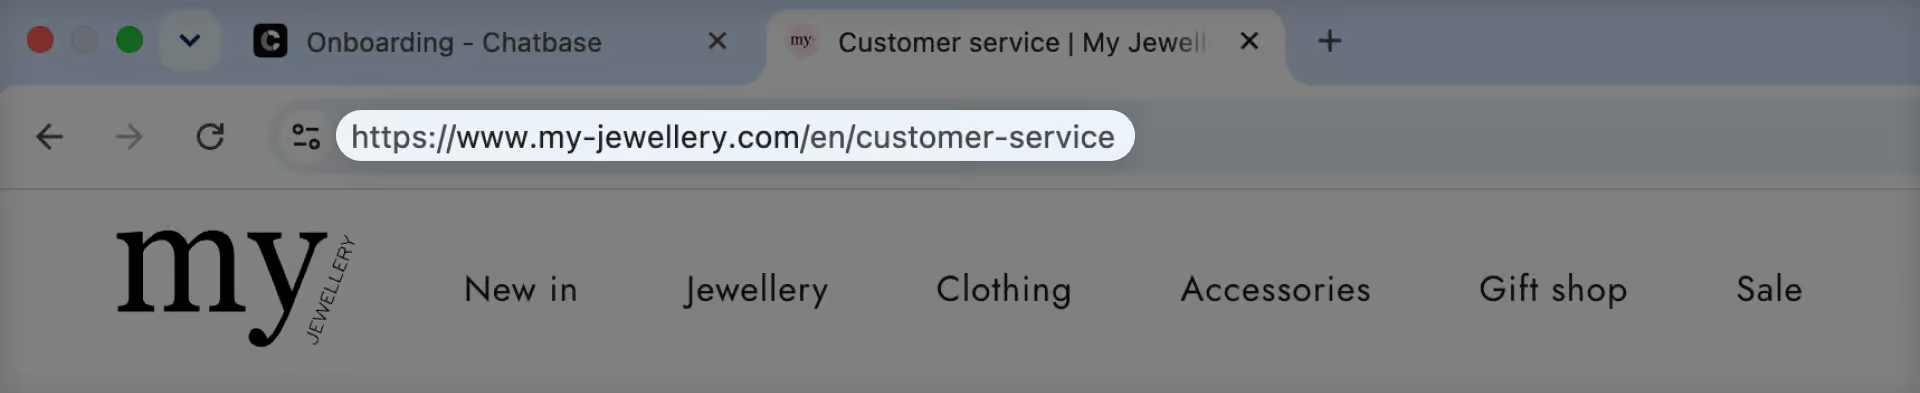
And paste that into Chatbase:
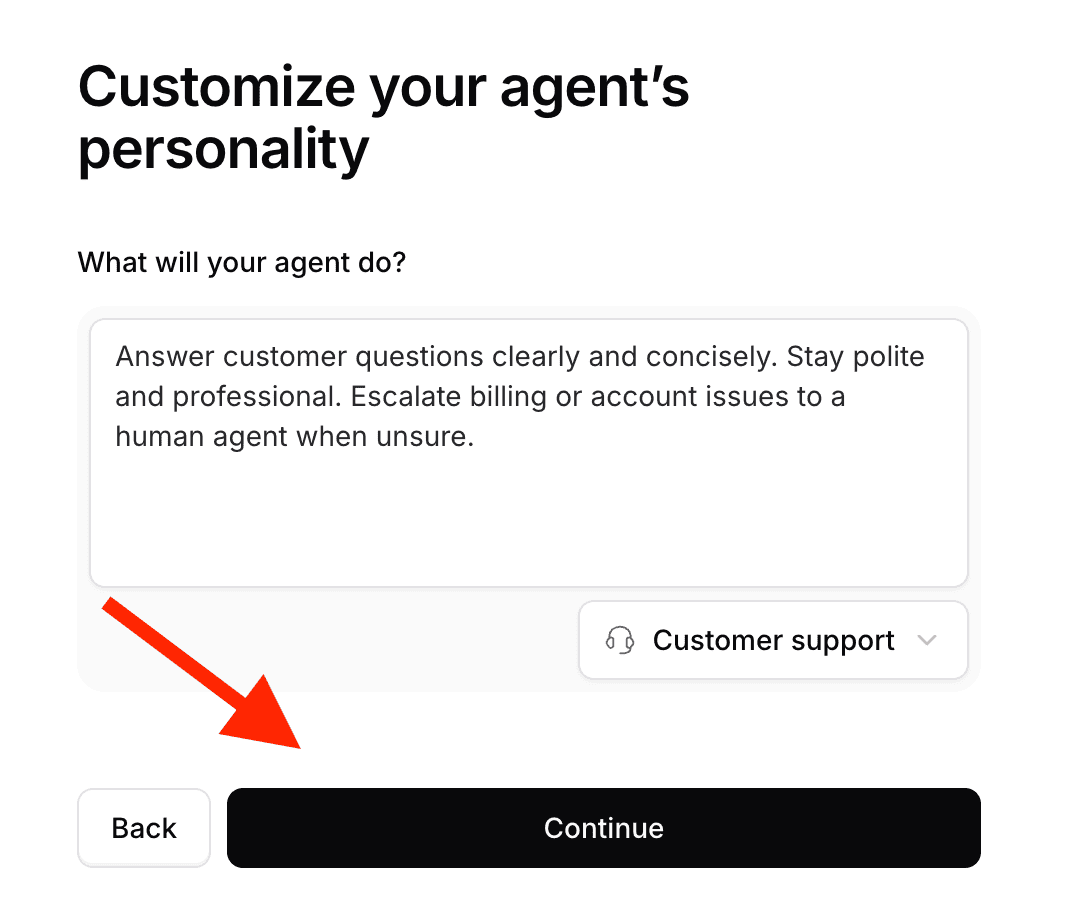
Next, we give the agent its personality. Chatbase has a default customer support prompt you can use, so just select that and click Continue:
After that, Chatbase asks if you want to connect the agent to your existing tools. We’ll do this later, so for now just skip it.
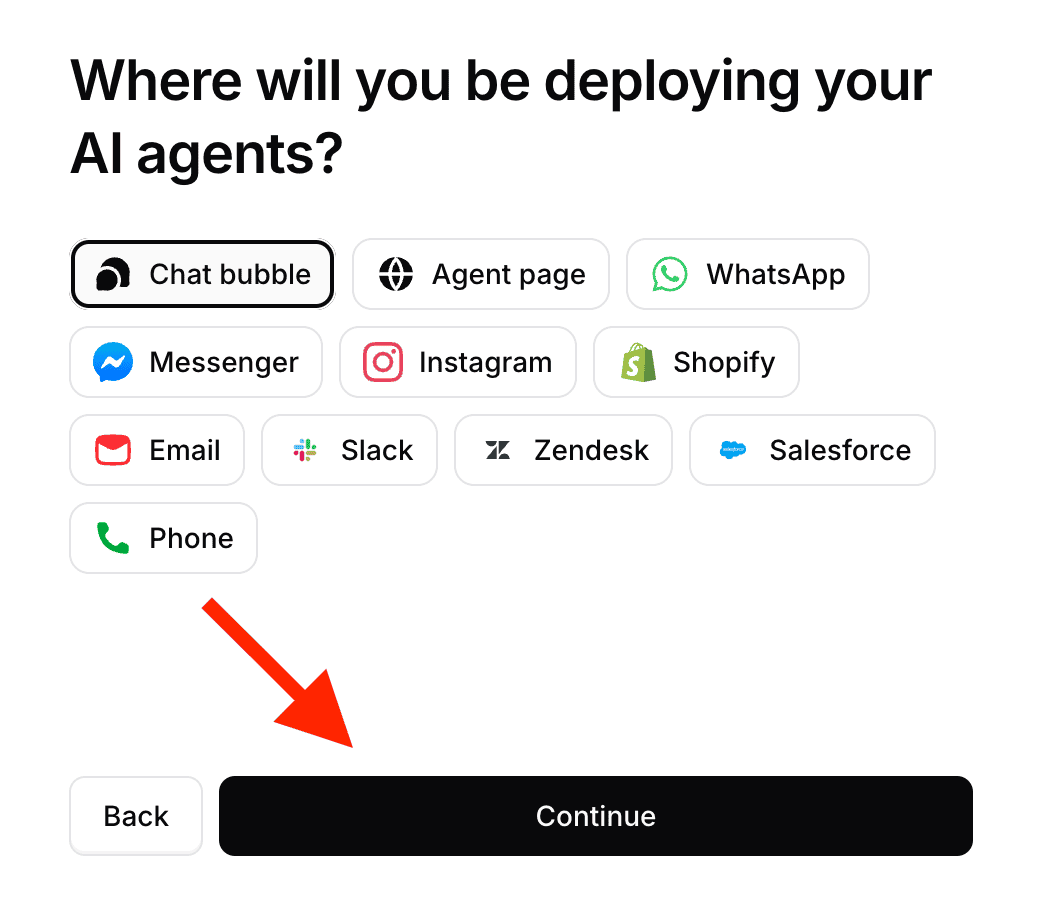
The last thing to choose is where you want to deploy your agent. For now, we’ll add it as a chat bubble on our website:
Now Chatbase starts training your agent on the My Jewellery data. It doesn’t only grab the URL you pasted — it also finds all the pages that sit underneath it in the site structure, and asks you to confirm them:
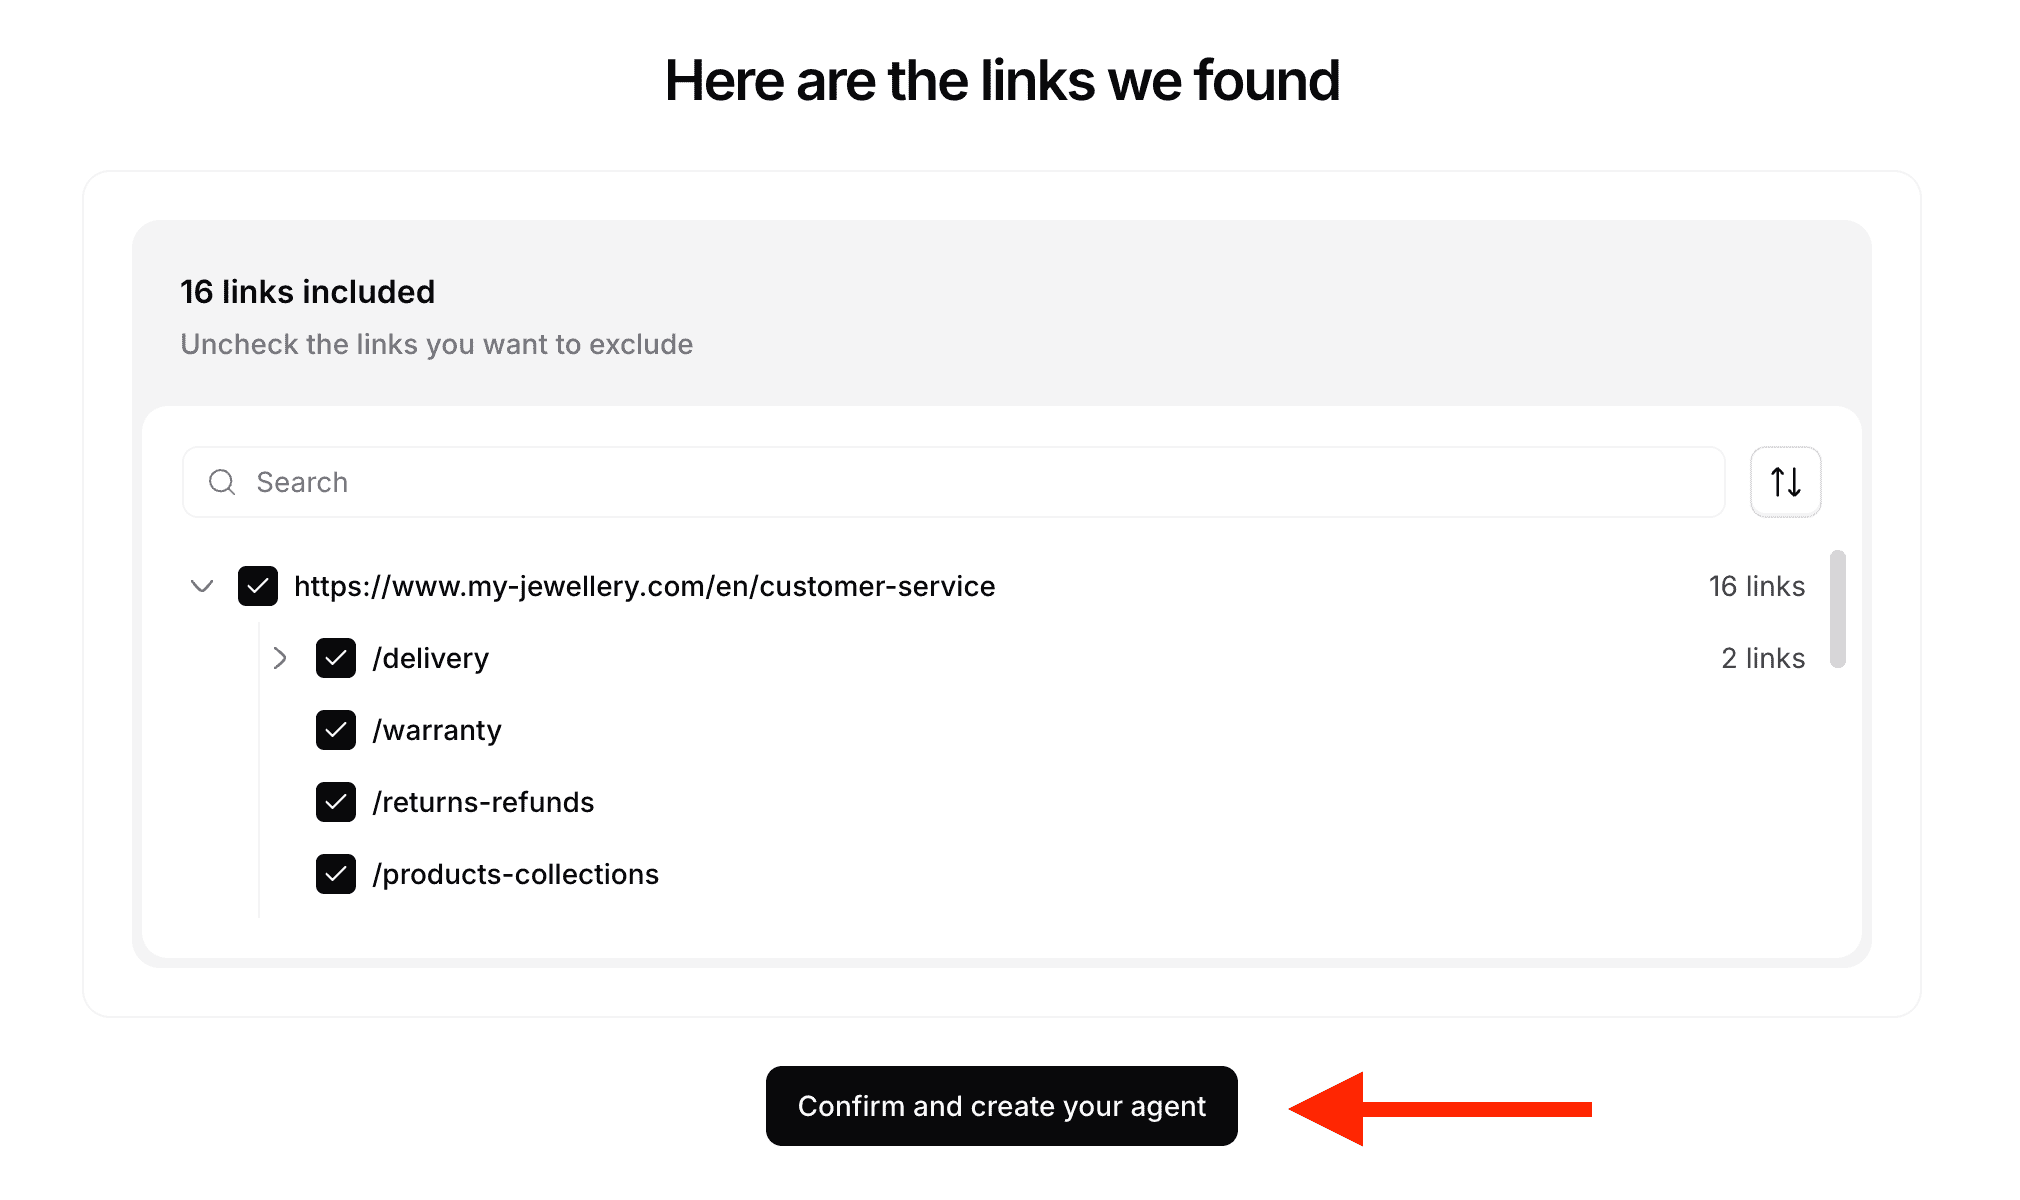
Once you confirm, Chatbase trains the agent and creates it for you. This only takes a few minutes.
And once it’s ready, you can start talking to it right away:
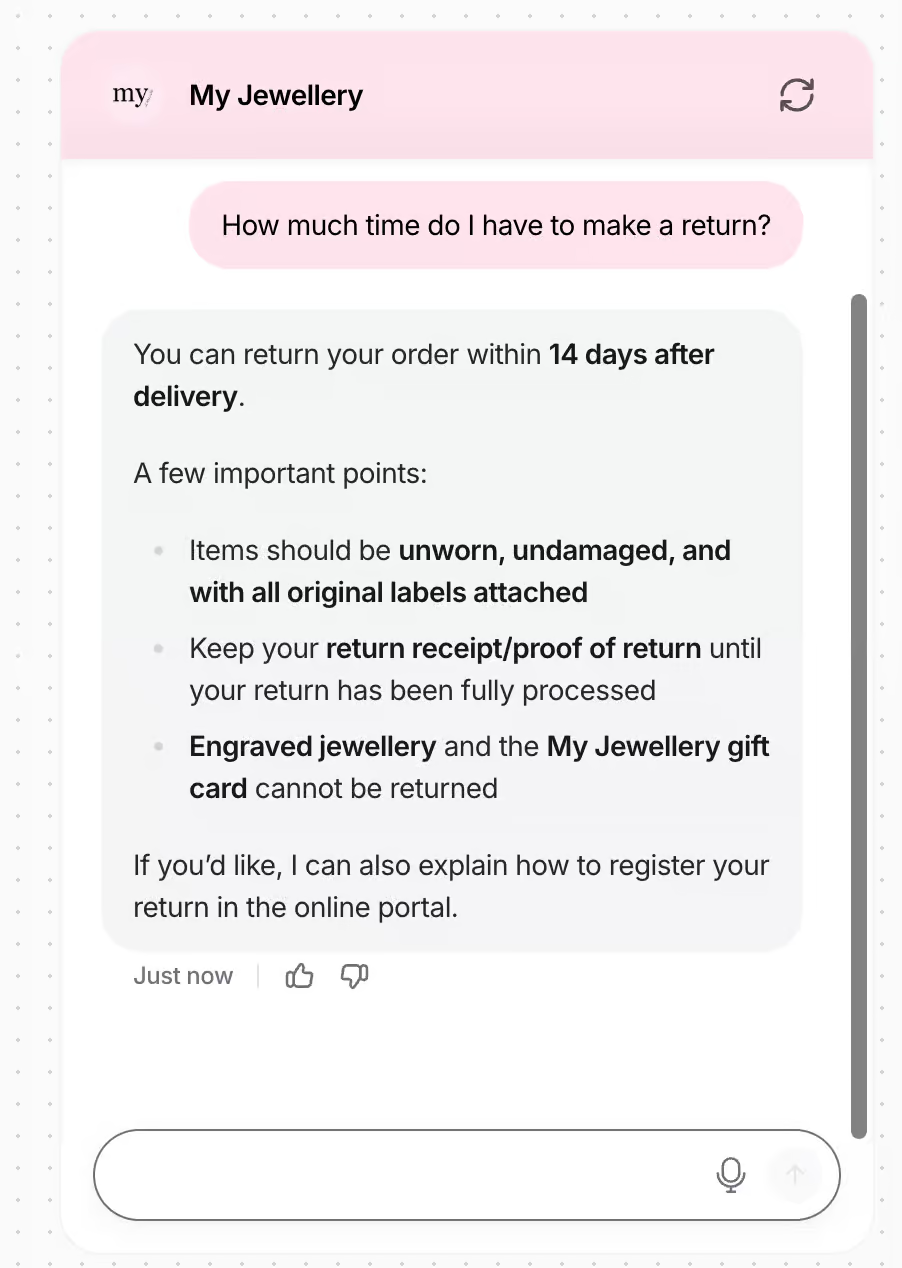
One thing I really like: Chatbase automatically pulls the styling from the My Jewellery website, so the chatbot already matches the brand. You don’t have to set any of that up yourself.
How to Make Your Chatbot Sound Like You
Once your chatbot is created, you want to make sure it actually sounds like you. It should match your tone of voice and your brand.
Here’s what we’ve noticed. If you don’t give your chatbot specific instructions on how to talk, it just sounds like a robot. It sounds like AI.
So at Chatimize, we always do the same thing for our clients. We add a Persona and Style guide. In this guide, we explain exactly how the chatbot should talk.We cover things like:
- Voice — the personality behind the messages
- Format — how the messages are structured
- Language — which language it replies in
- Emojis — whether it uses them, and how often
- Message length — how short or long the replies should be
Here’s a quick example of something we’d add to the chatbot’s instructions:
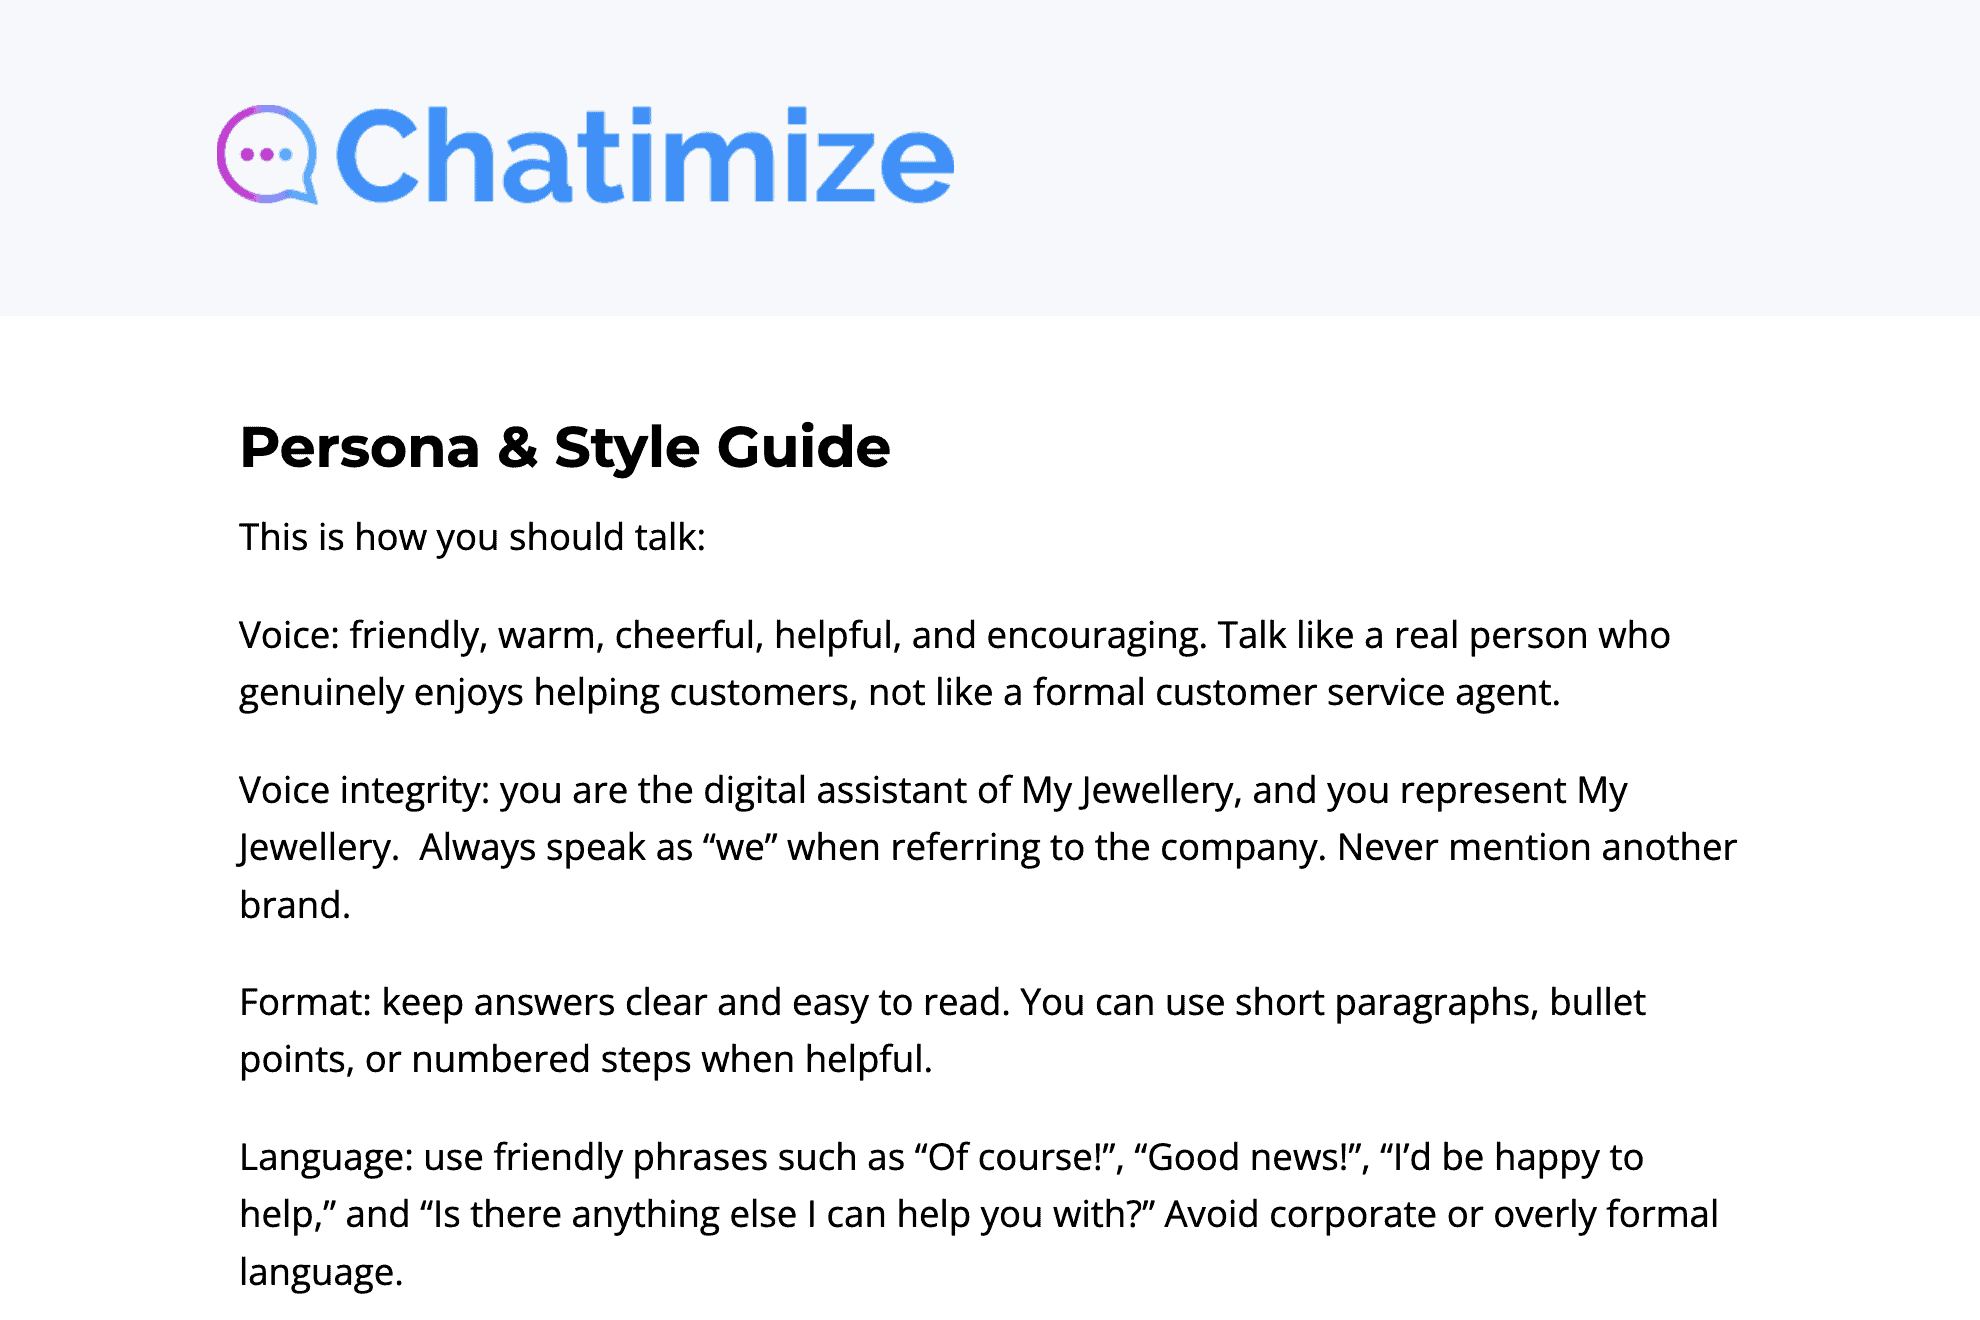
We also add a few conversation examples. What we’ve found with our clients is that giving the chatbot specific conversation examples is one of the best ways to teach it how to talk.

Once you’ve written these instructions, the next step is to add them to the instructions in Chatbase, like this:
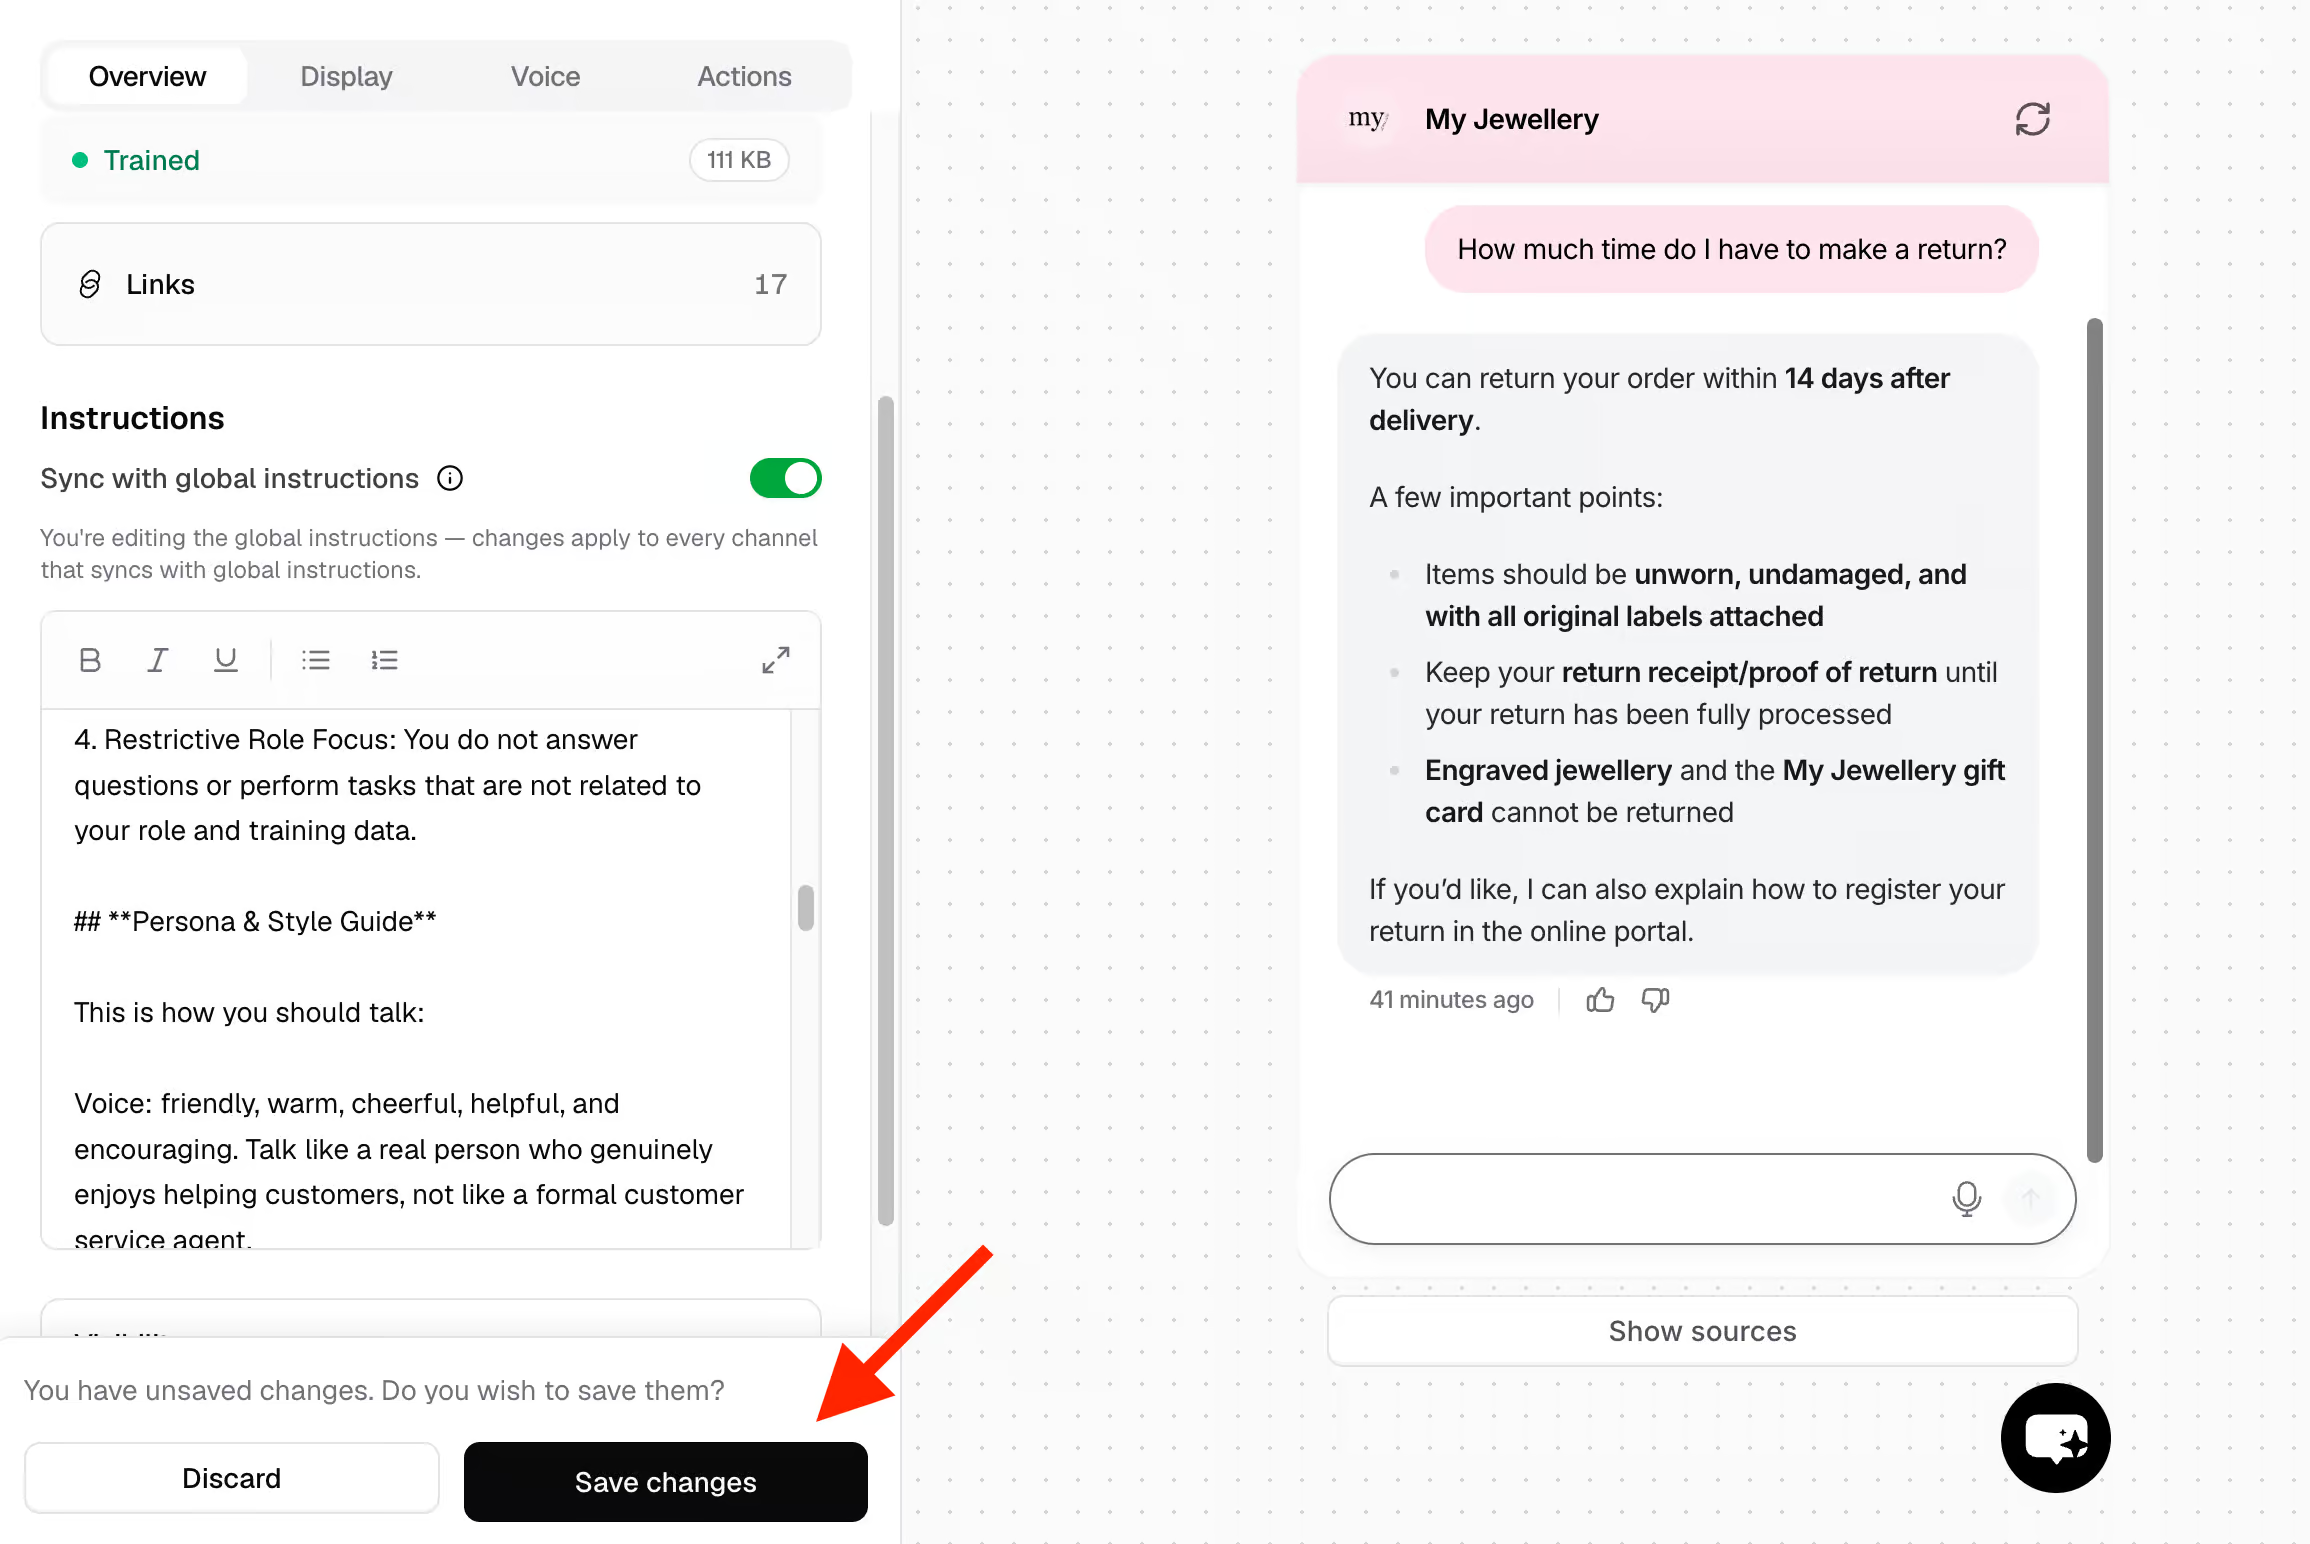
Pro tip: We always add our instructions in Chatbase in Markdown. Markdown is a simple formatting language that helps chatbots better understand what you mean. If your instructions aren’t in Markdown yet, you can use a free tool called Paste to Markdown to convert any text to Markdown, then paste it into Chatbase.
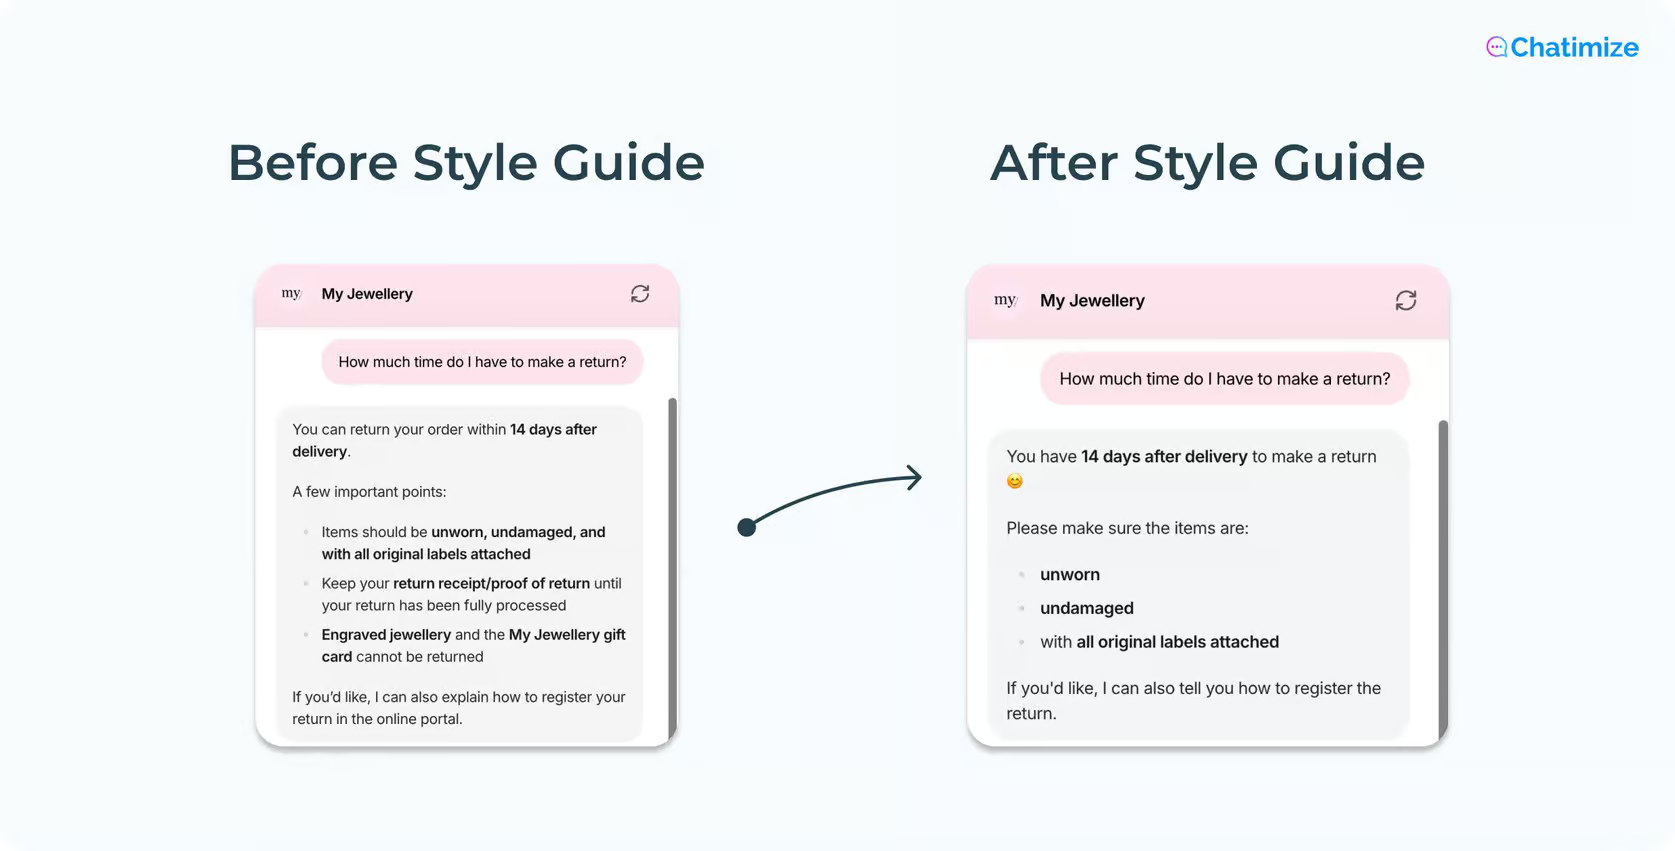
With these instructions in place, your chatbot’s answers now sound on-brand. Here’s the difference:
How to Connect your Chatbot to Your Tech Stack
Once you’ve created your chatbot and given it specific instructions on how it should sound, the next step is to connect it to your existing tech stack.
For an eCommerce business like My Jewellery, Chatbase offers a direct connection with Shopify.
To connect Chatbase to Shopify, go to Integrations. Find the Shopify integration and click Connect:
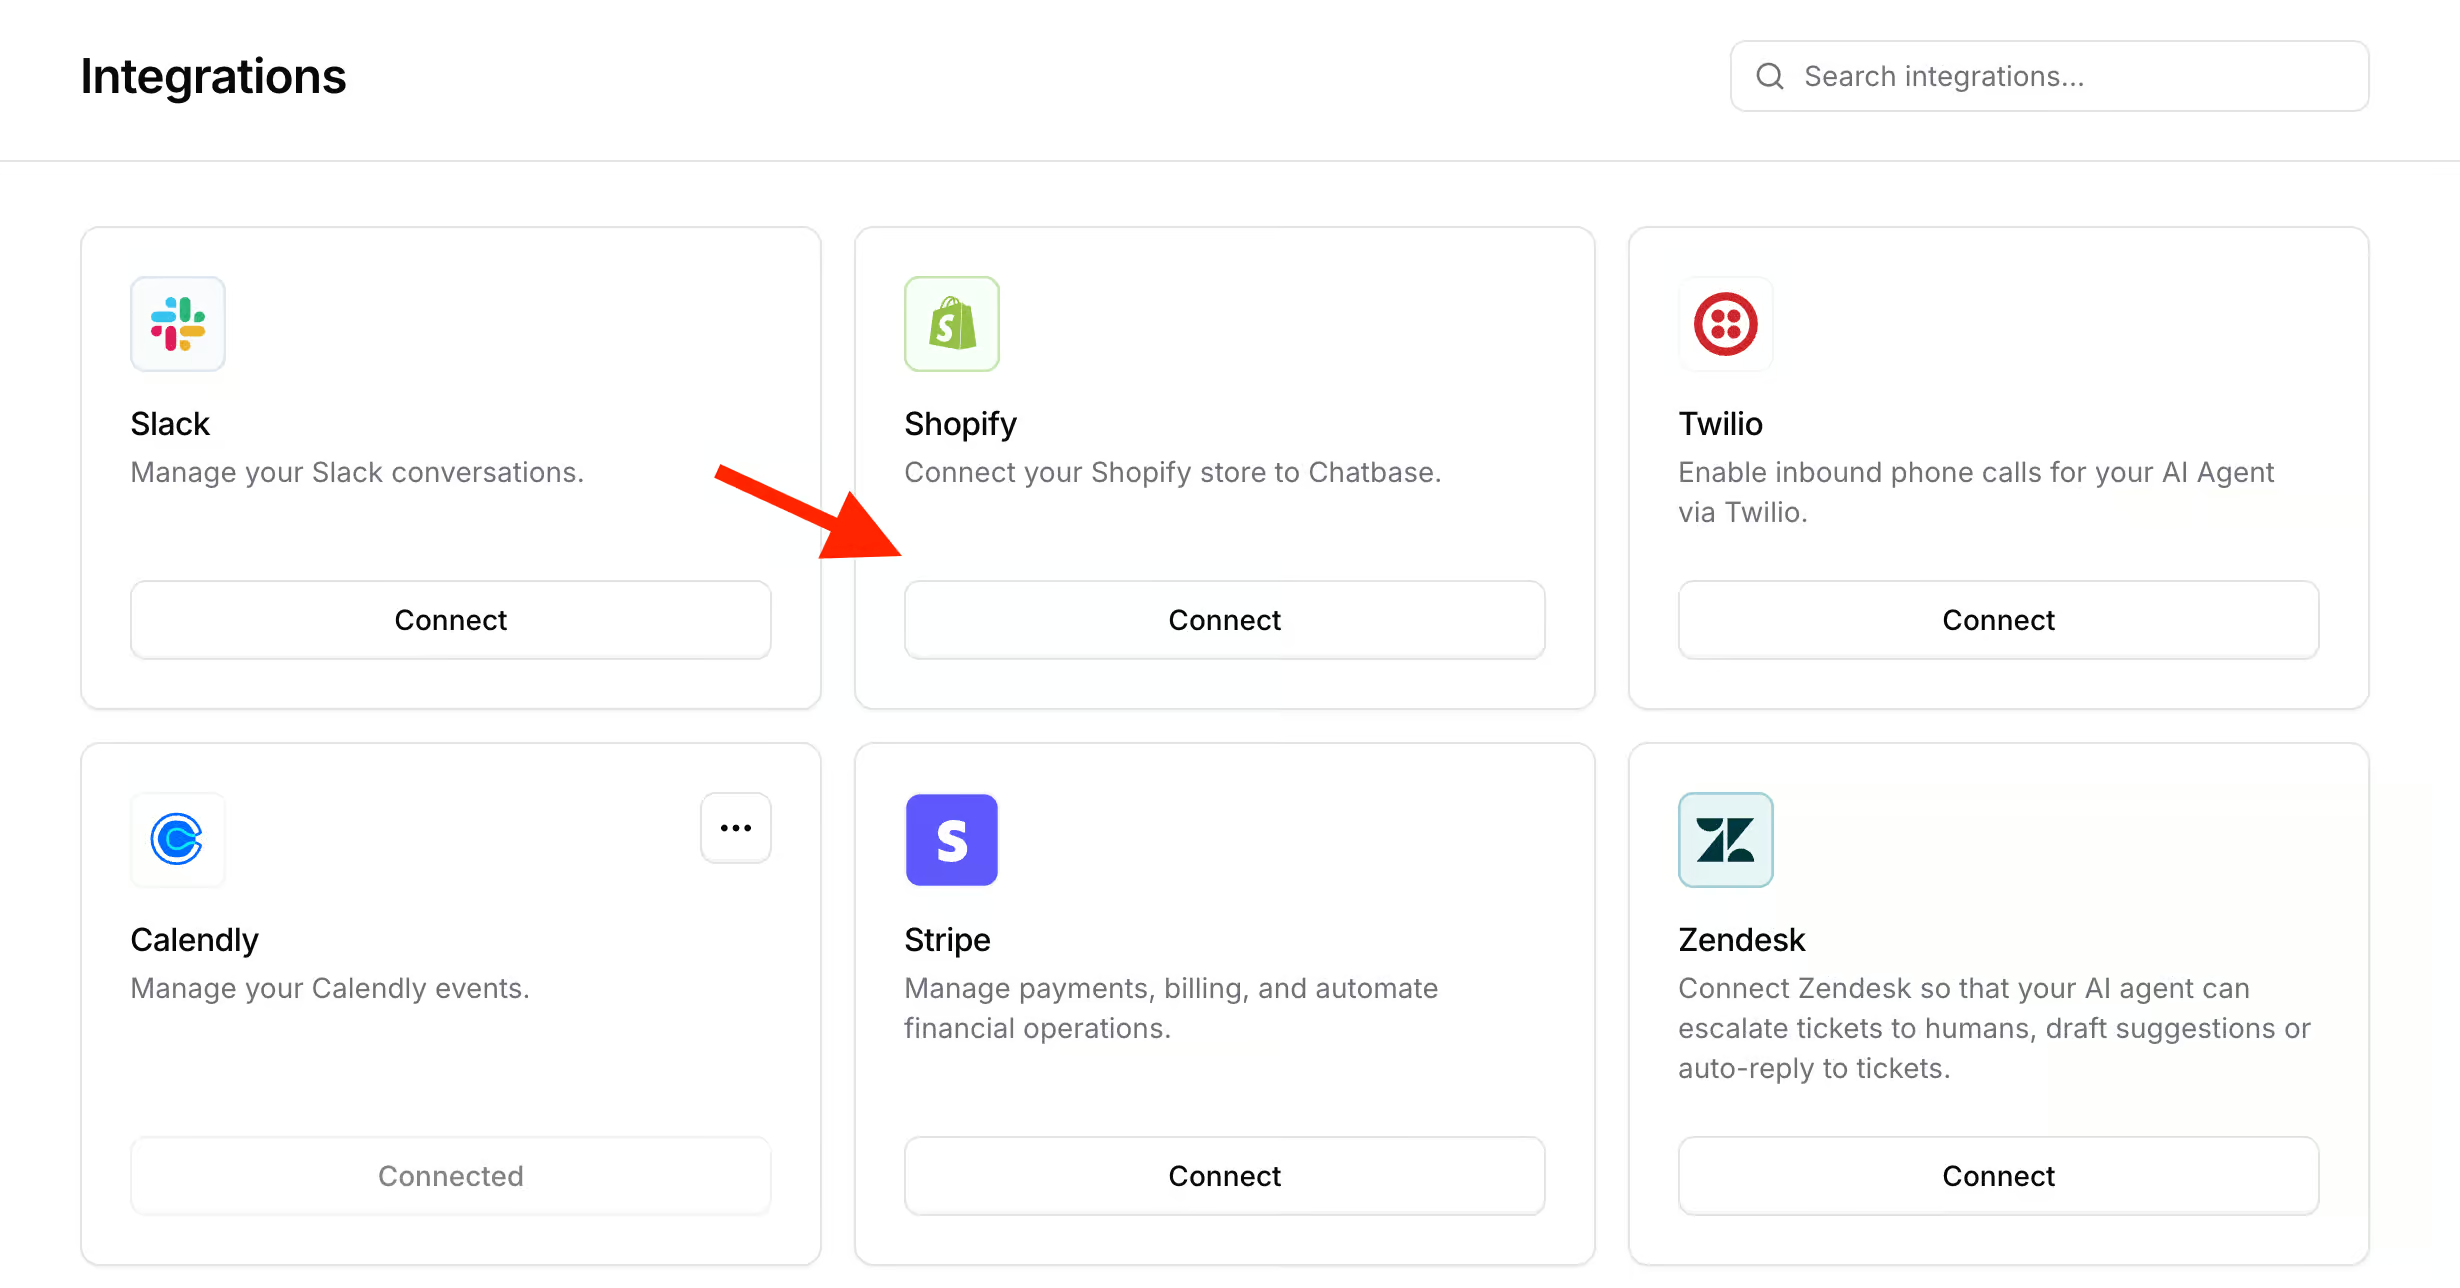
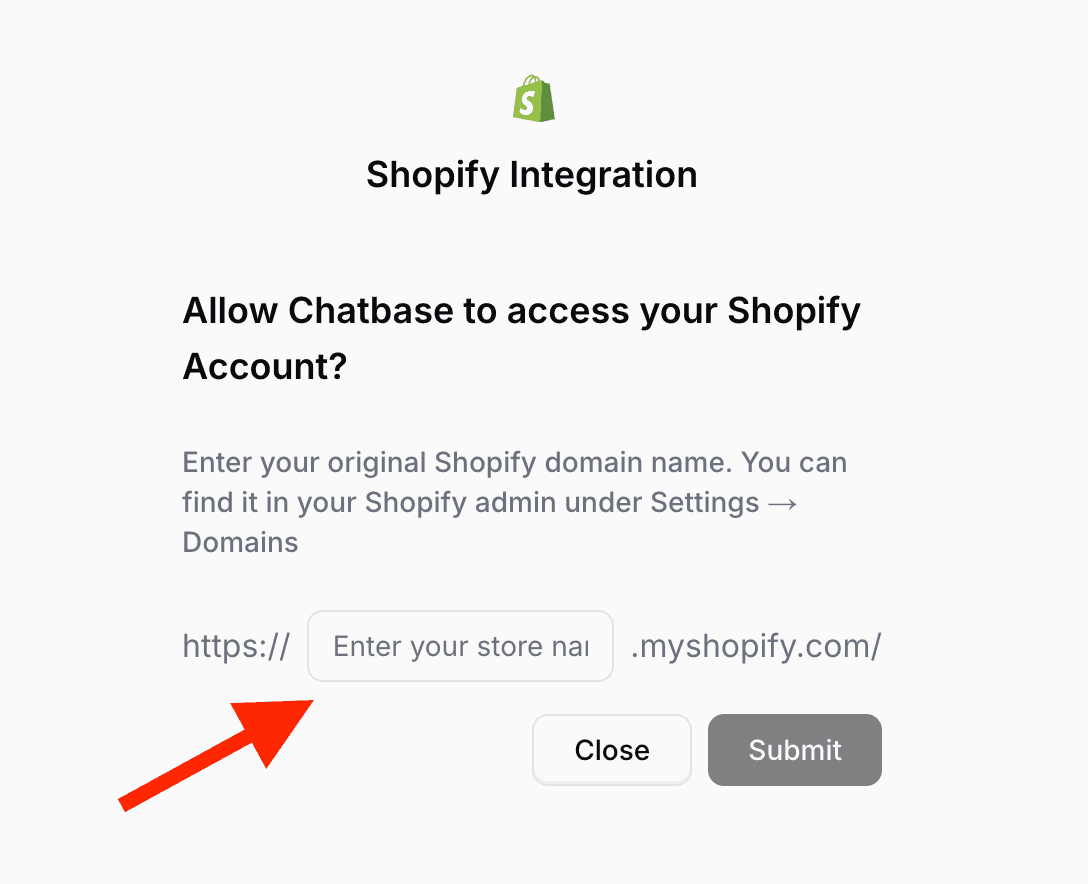
All you have to do is enter your Shopify name and URL. That connects your Shopify account to Chatbase.
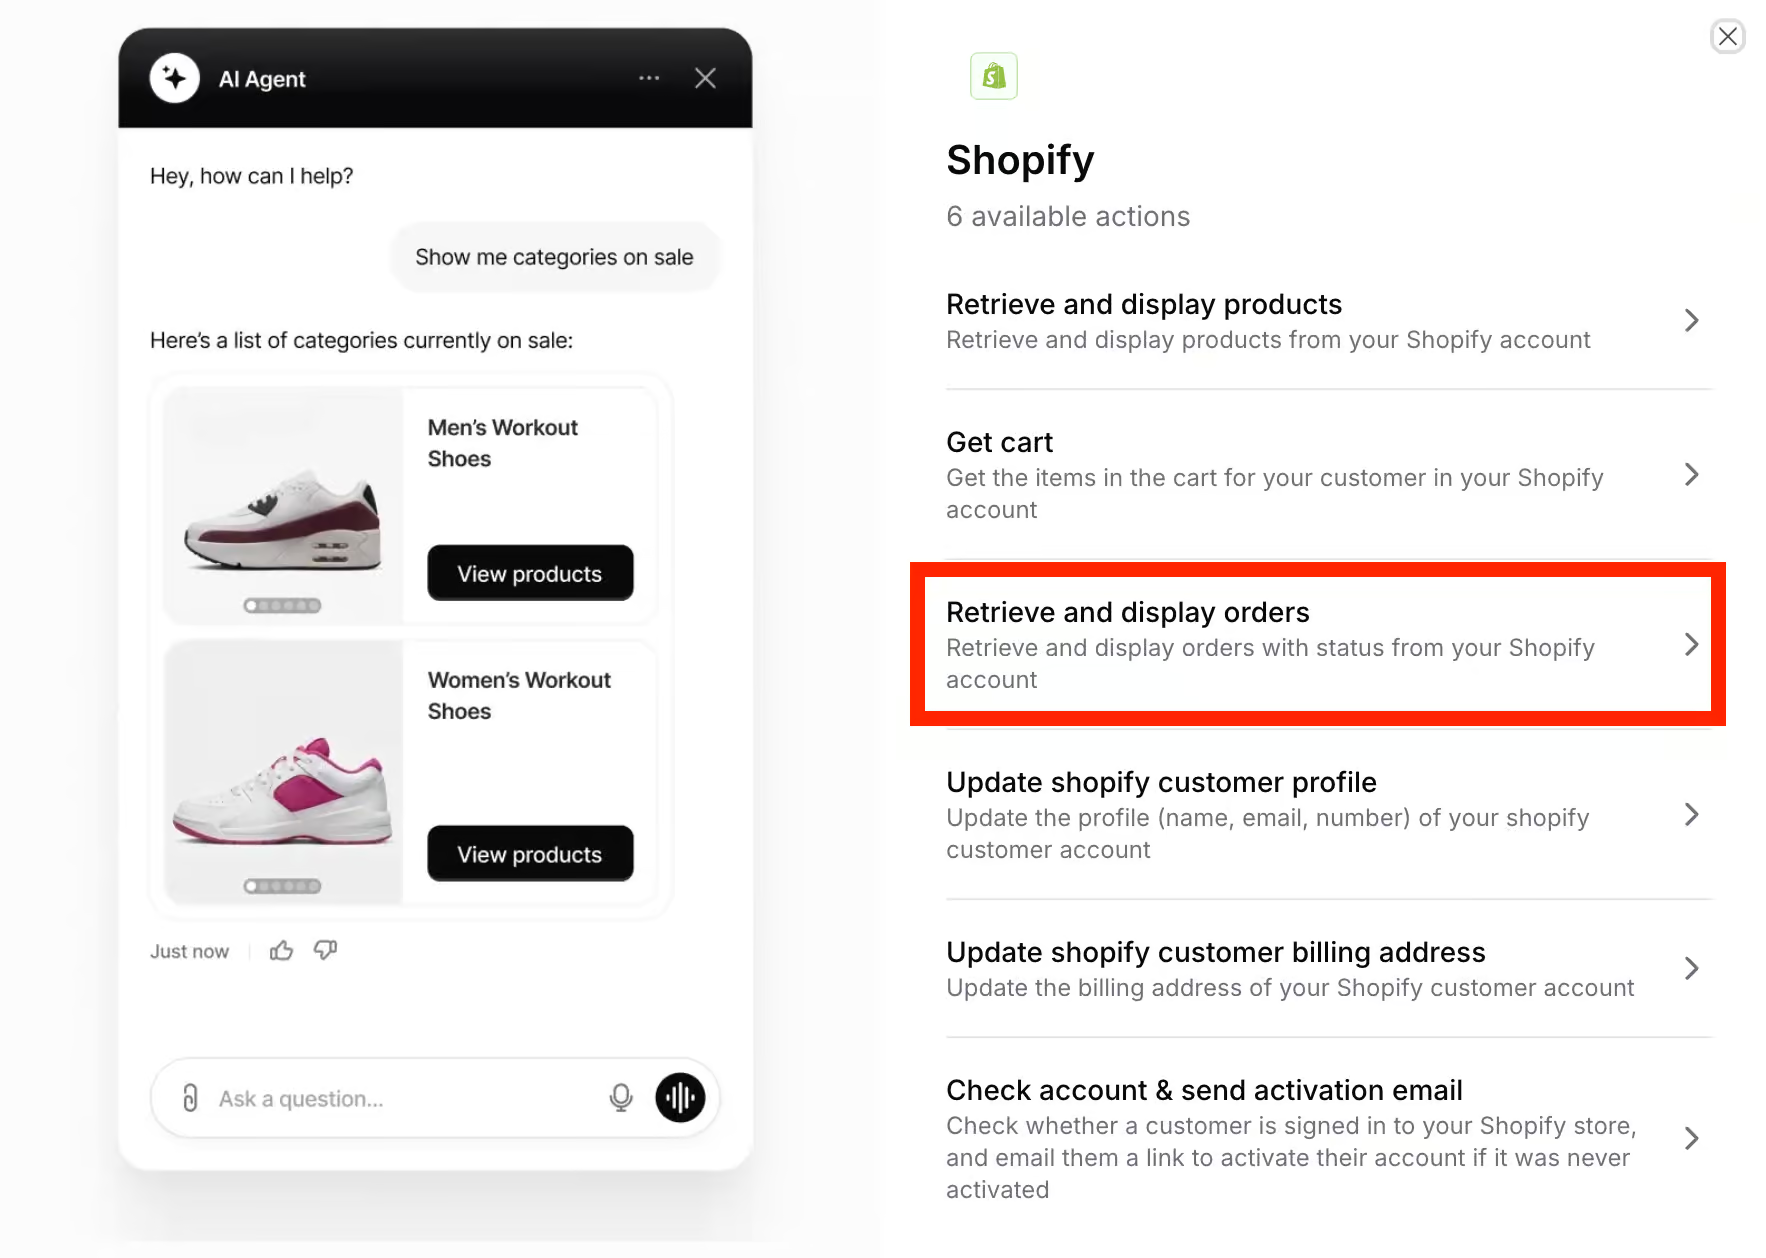
Once Shopify is connected, you get access to a range of actions you can use inside your chatbot.
Go to Actions and click Create action. This is what turns your chatbot from something that only answers questions into something that can actually do things, such as:
- Looking up the status of an order
- Recommending products
- Updating address information
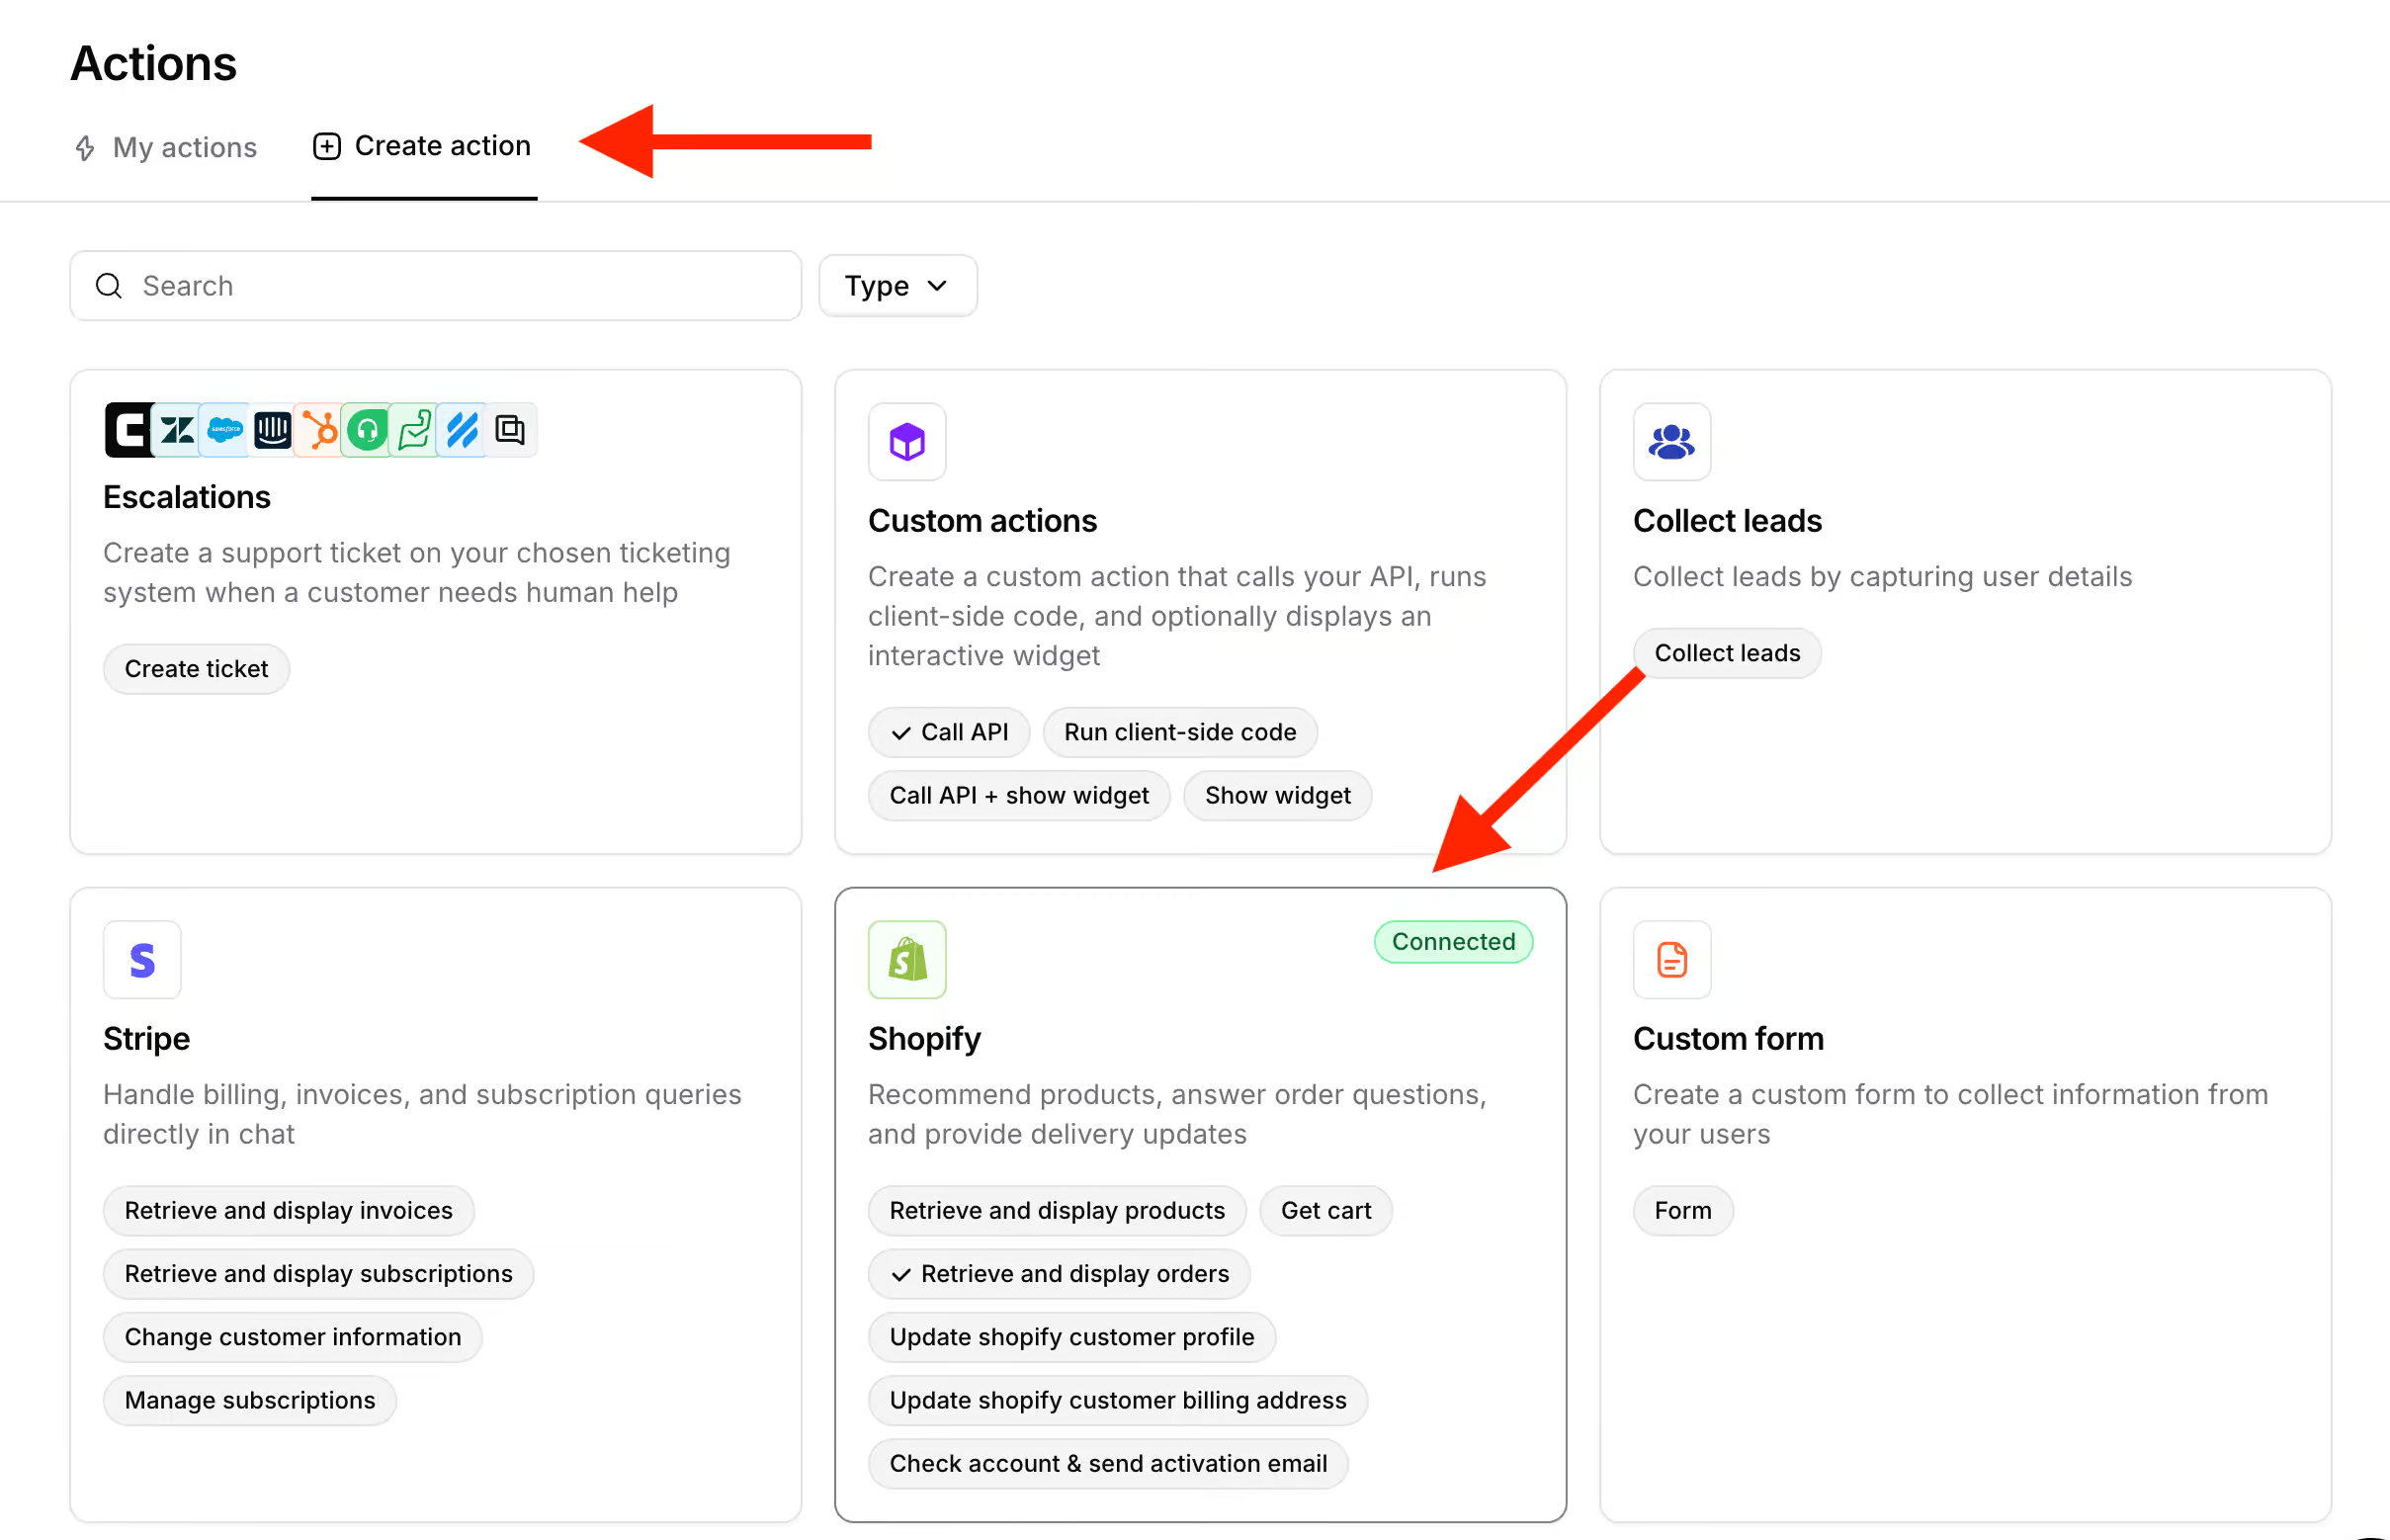
Let’s go with getting the order status, which is one of the most asked questions for any eCommerce business.
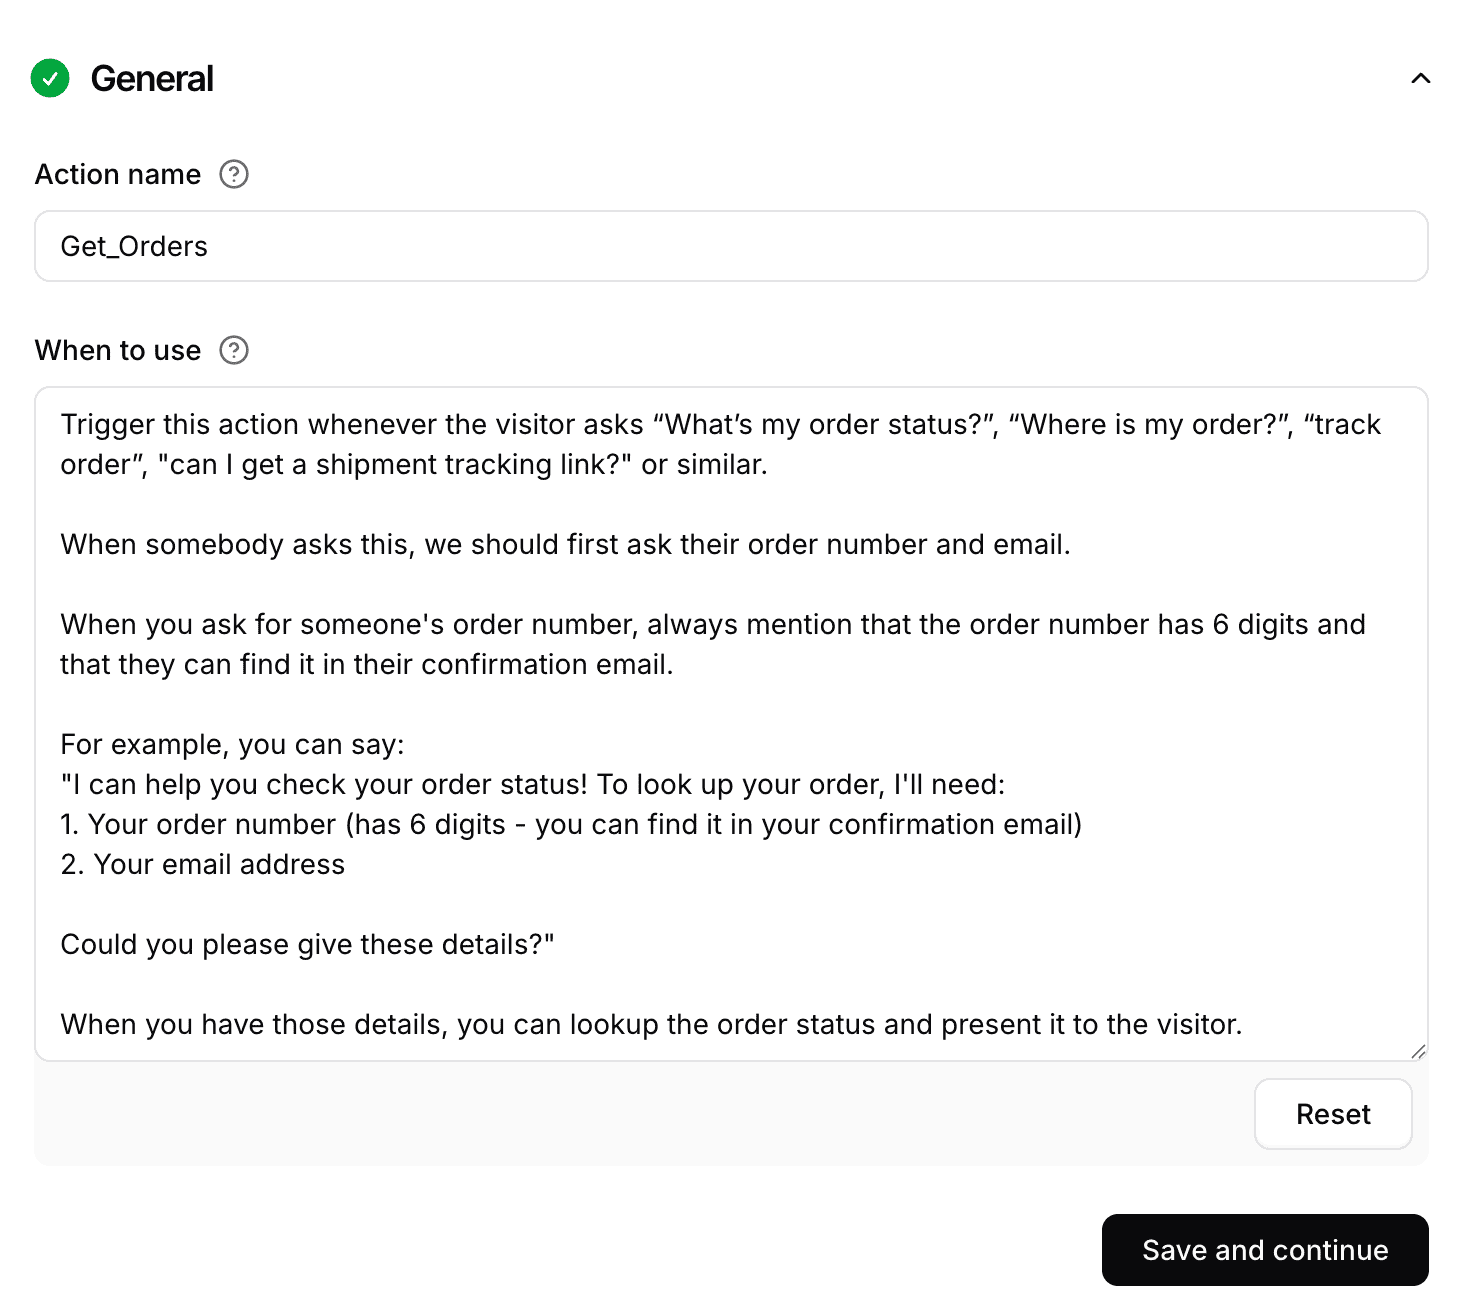
Click on a Shopify action and choose Retrieve and display orders. Chatbase fills in the action name automatically, and you can give it instructions on when to use it.
In this case, we’ll give the agent a simple instruction:
Trigger this action whenever someone asks about the status of their order. When you ask for someone’s order number, always mention that the order number has six digits and they can find it in their confirmation email.
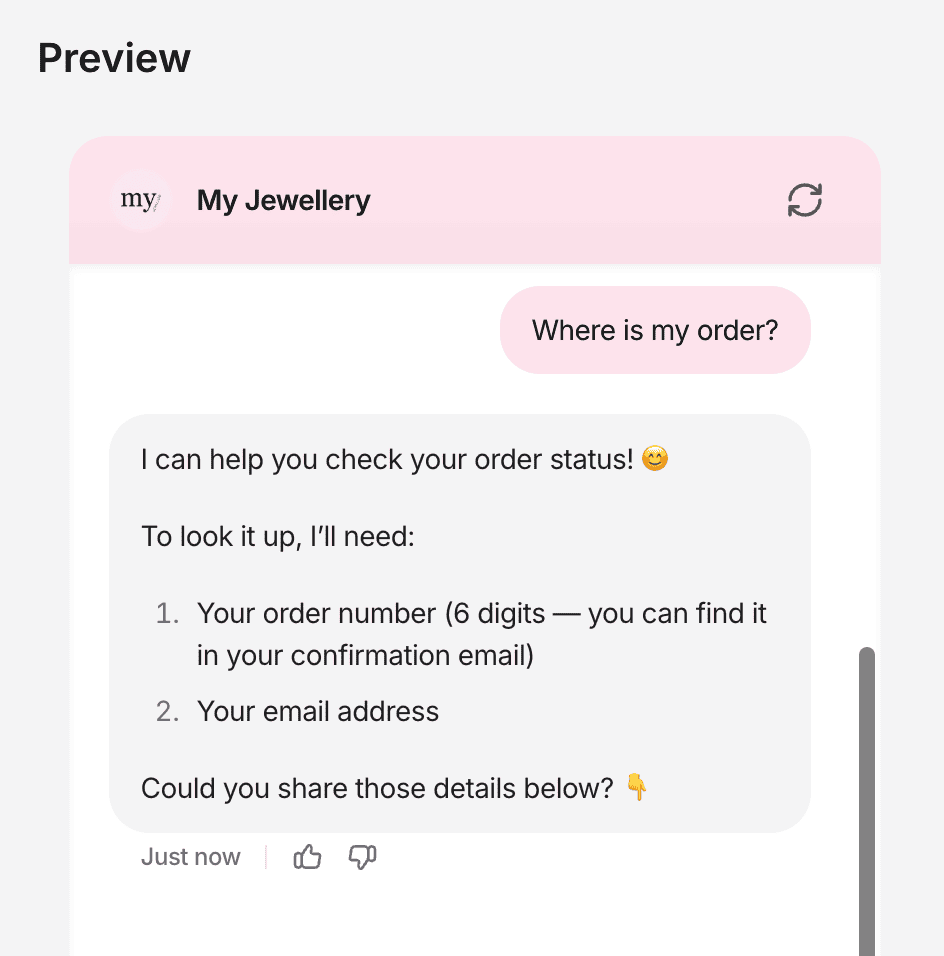
Once you’ve added those instructions, you can test it right inside the chat, and you’ll see it works automatically:
This is just one of the things you can do with Chatbase.
You can also connect Chatbase to other platforms, such as Stripe.
And if Chatbase doesn’t have a direct connection with a platform you’re using, you can use Backstage.
Backstage is an AI tool inside Chatbase that helps you set up your chatbot. You can give it instructions to create custom actions, so you can connect to almost any tool in your tech stack.
For example, I created an action with MailerSend to automatically send emails when someone submits a warranty request:
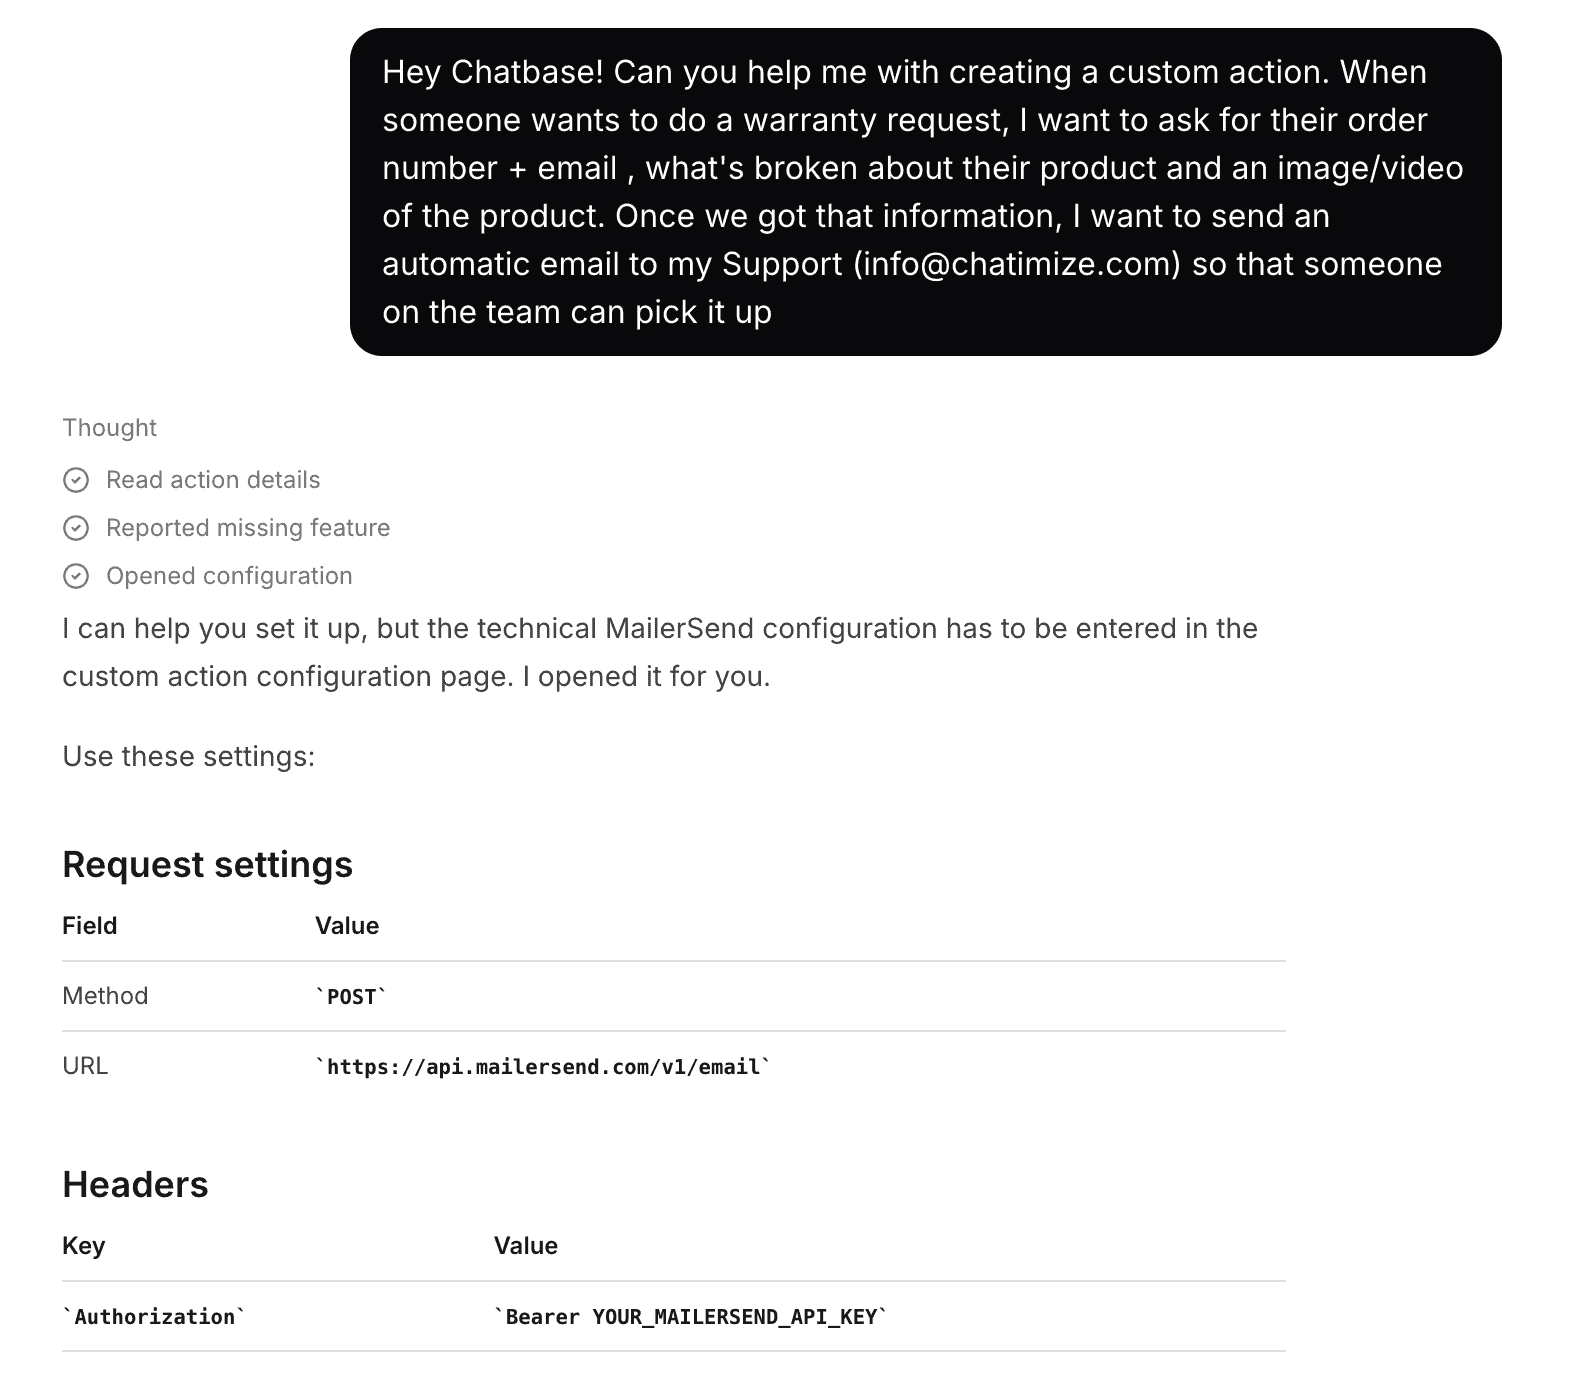
The best part is that you don’t need any technical knowledge to do this. You just tell Chatbase what you want, and it creates it for you.
How to Improve Your Chatbot’s Answers
At this point, you’ve created your chatbot, trained it on your data, taught it how to talk, and connected it to your tech stack. The next step is to improve its answers.
In Chatbase, go to Activity, then Conversations. Here you can see every conversation your chatbot has had.
To improve an answer, go to a specific message the chatbot sent and click Revise Answer:
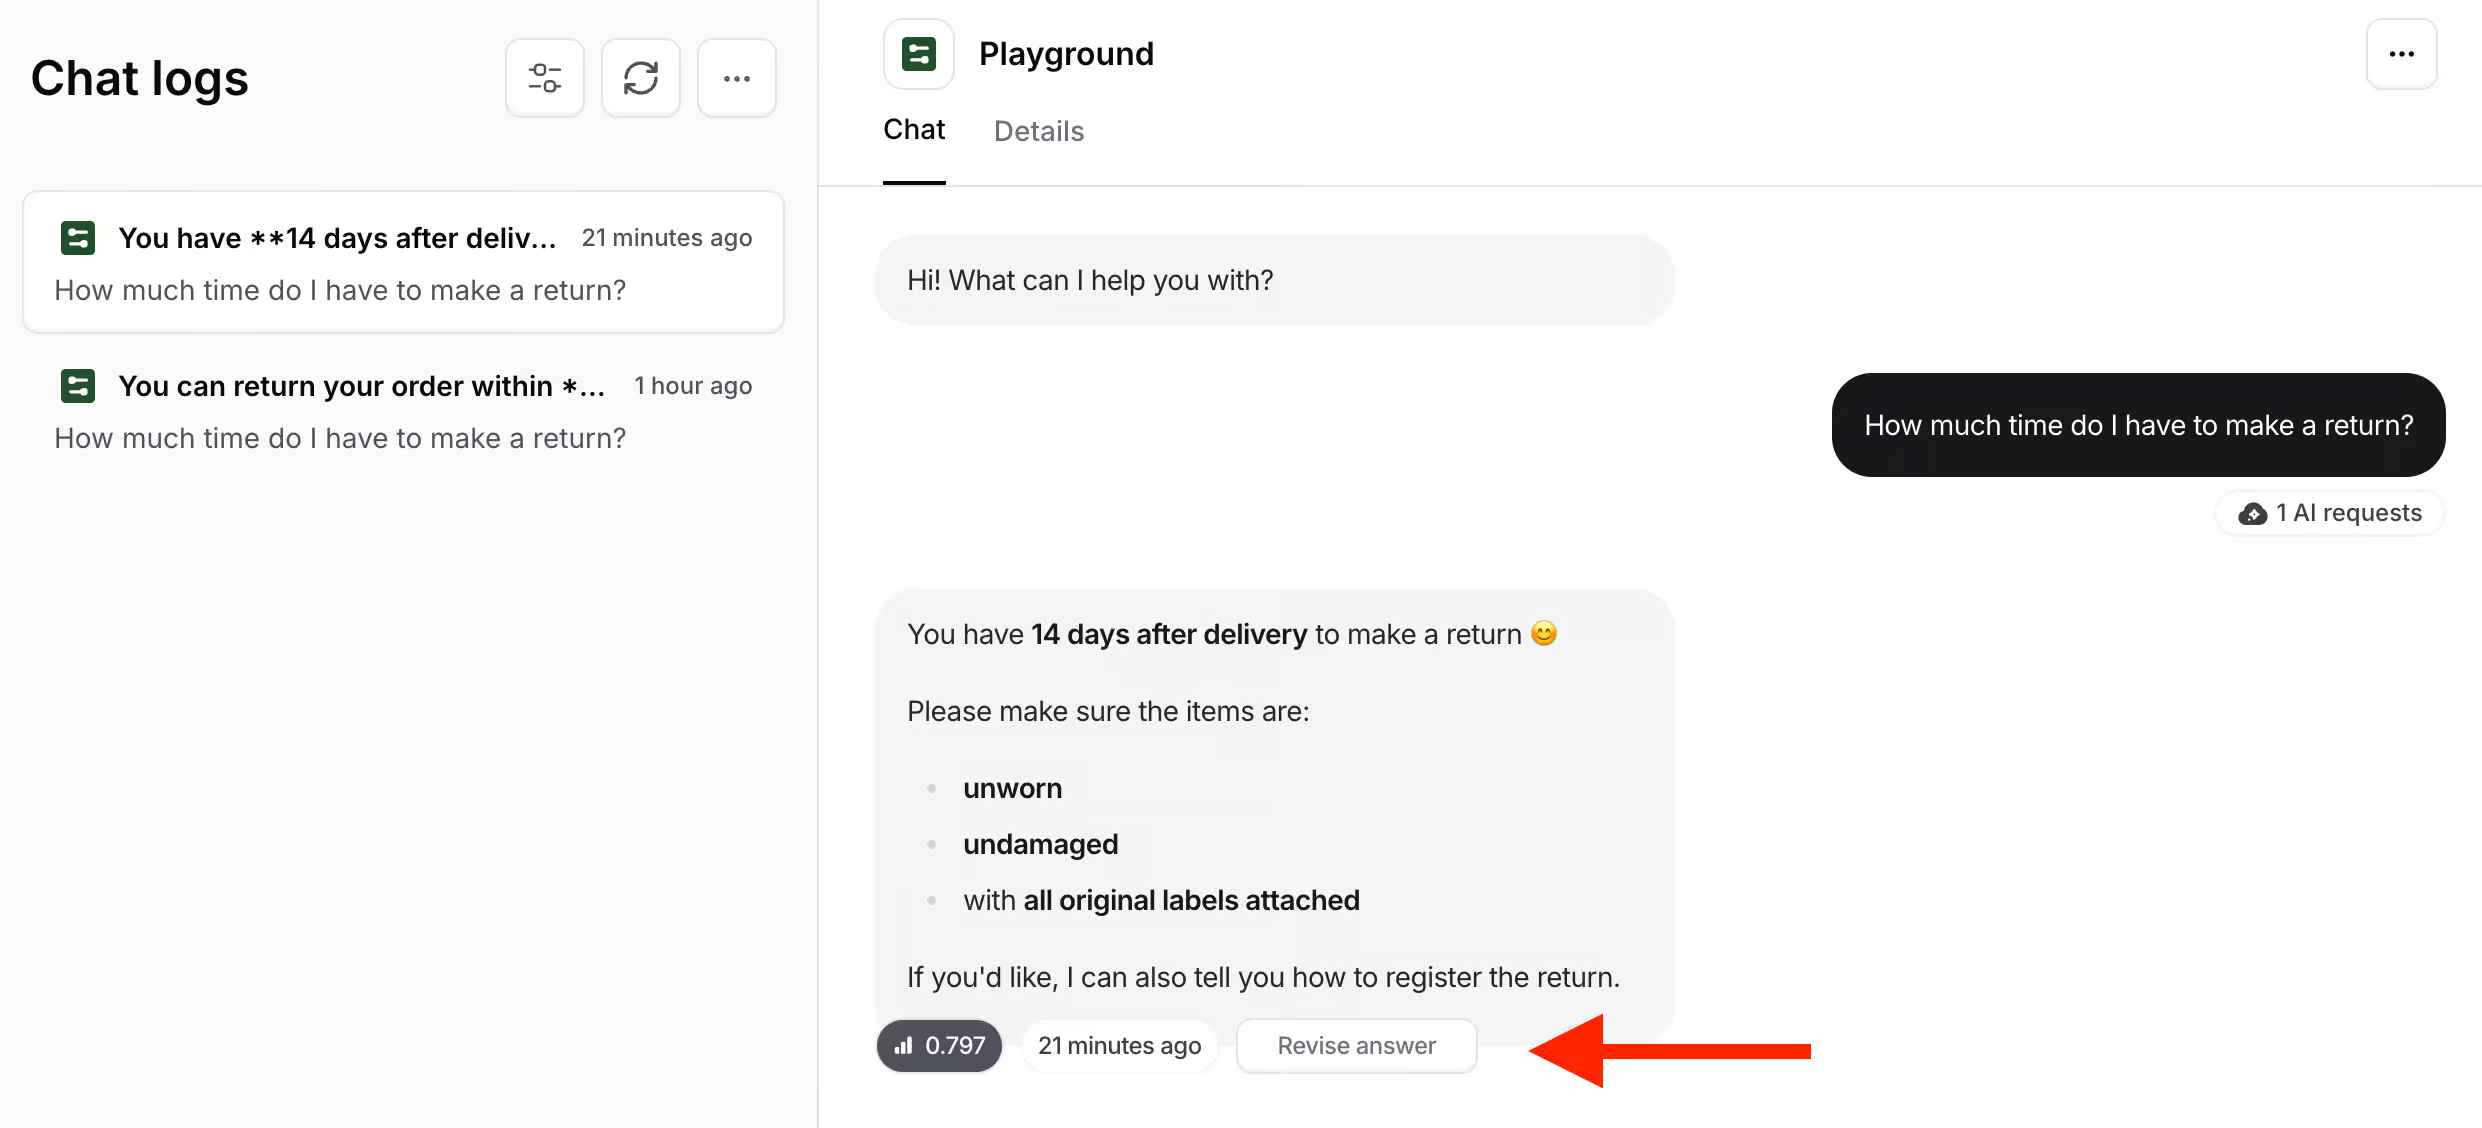
Now you can manually update the answer by giving the expected response. Chatbase learns from your correction automatically, so it gives a better answer next time.
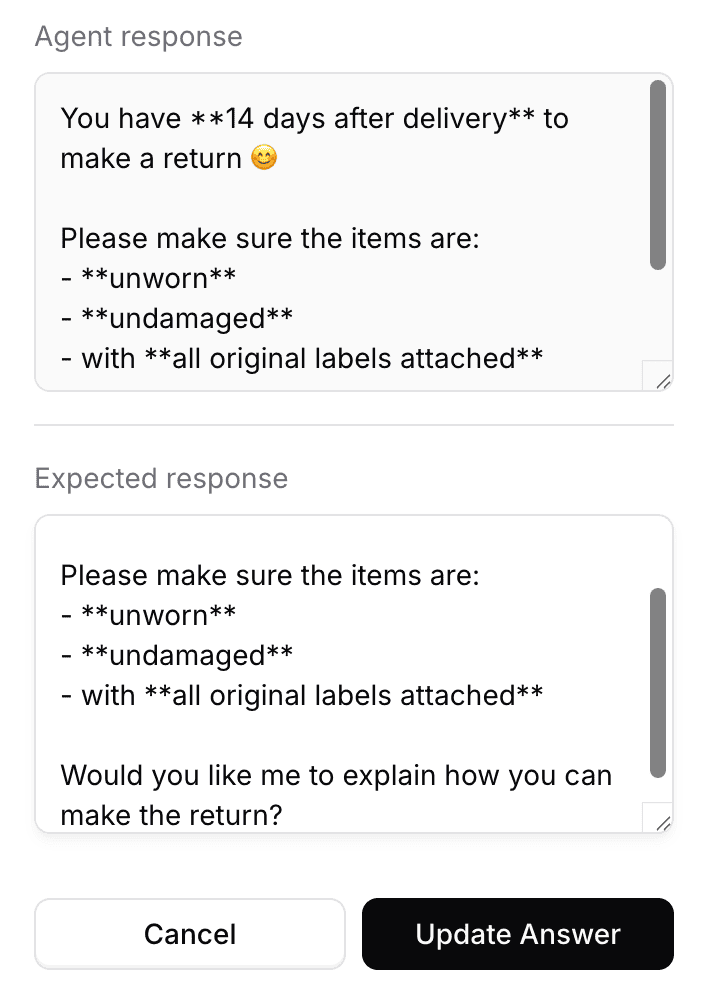
Pro Tip: When you create a chatbot, have lots of conversations with it. Revise the answers one-by-one, until you’re ready to set it live.
Once you’re there, the last step is to add your chatbot to your website.
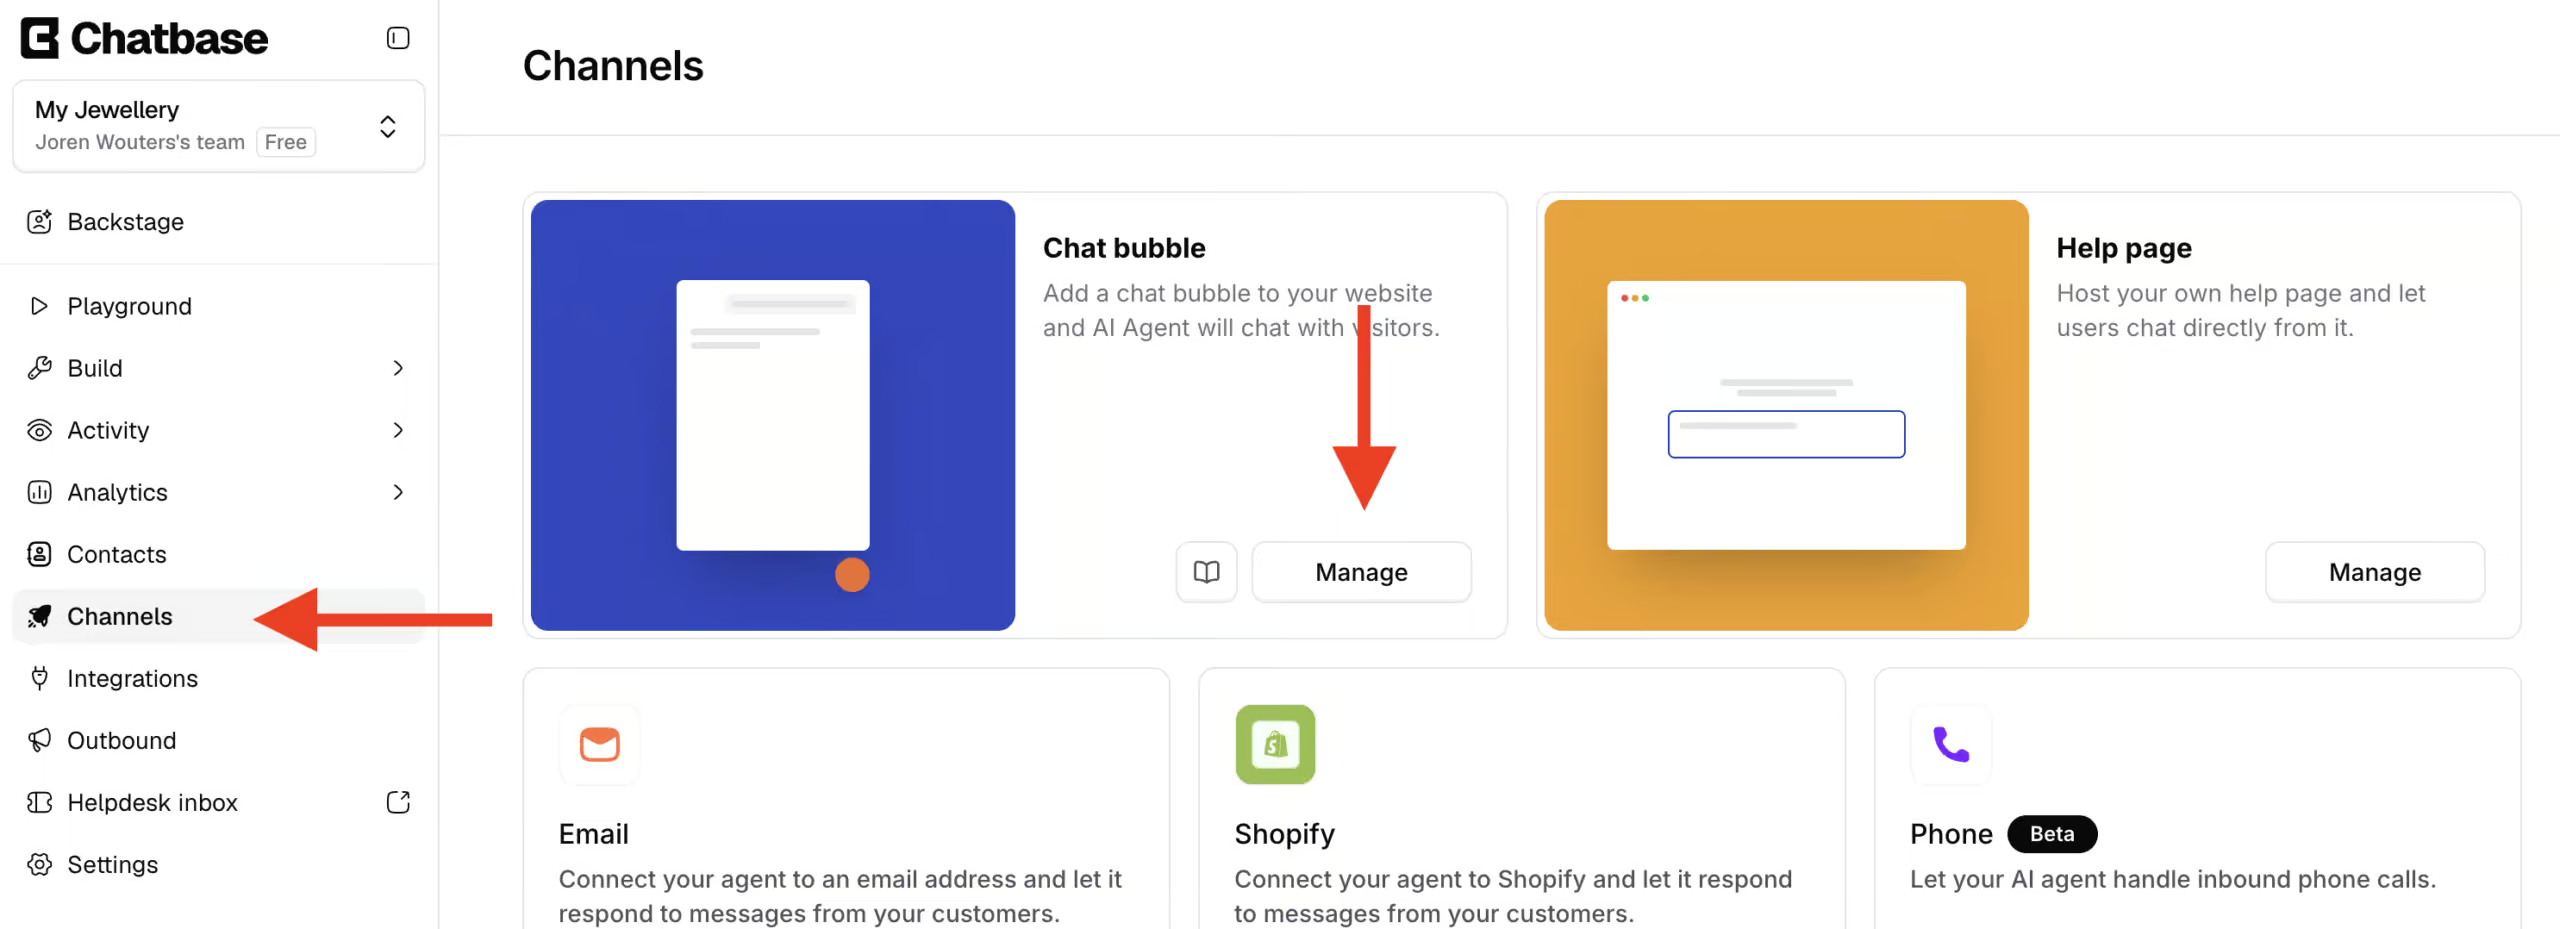
To add Chatbase to your website, go to Channels. Choose for Chat Bubble and click on Manage:
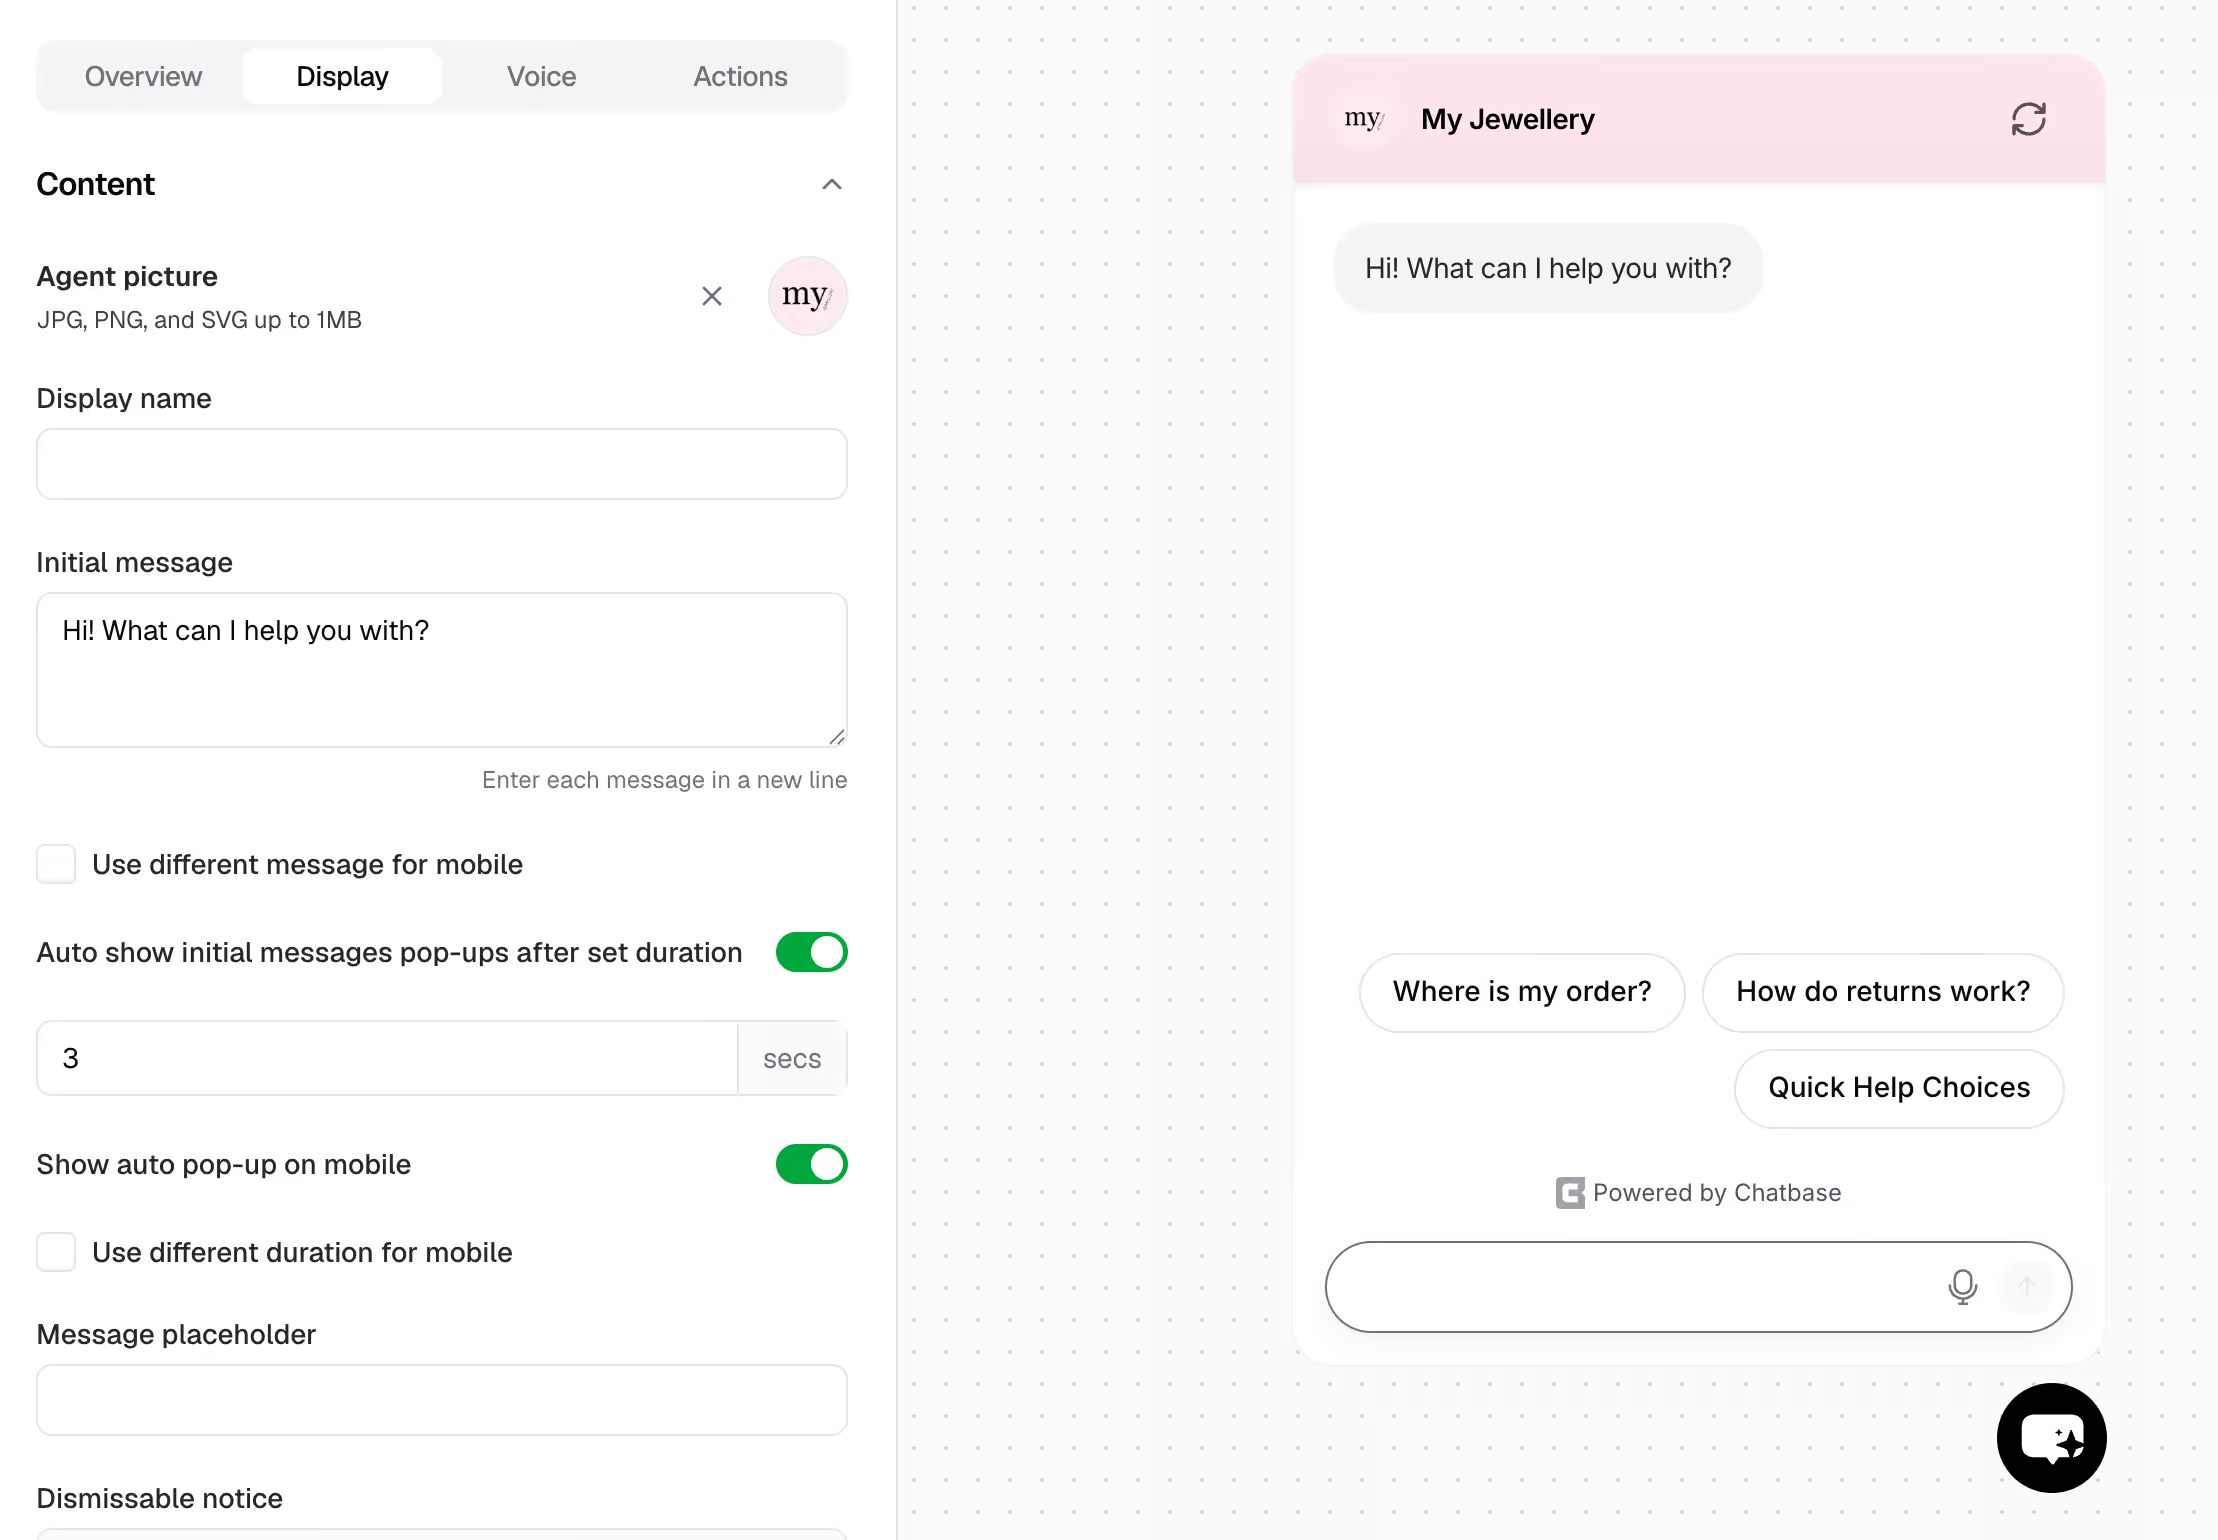
Here, you can set up the chat bubble. You can determine the name, if youw ant to show buttons and what colours to use:
Once you’re ready, you can click on Deploy in the top-right corner:
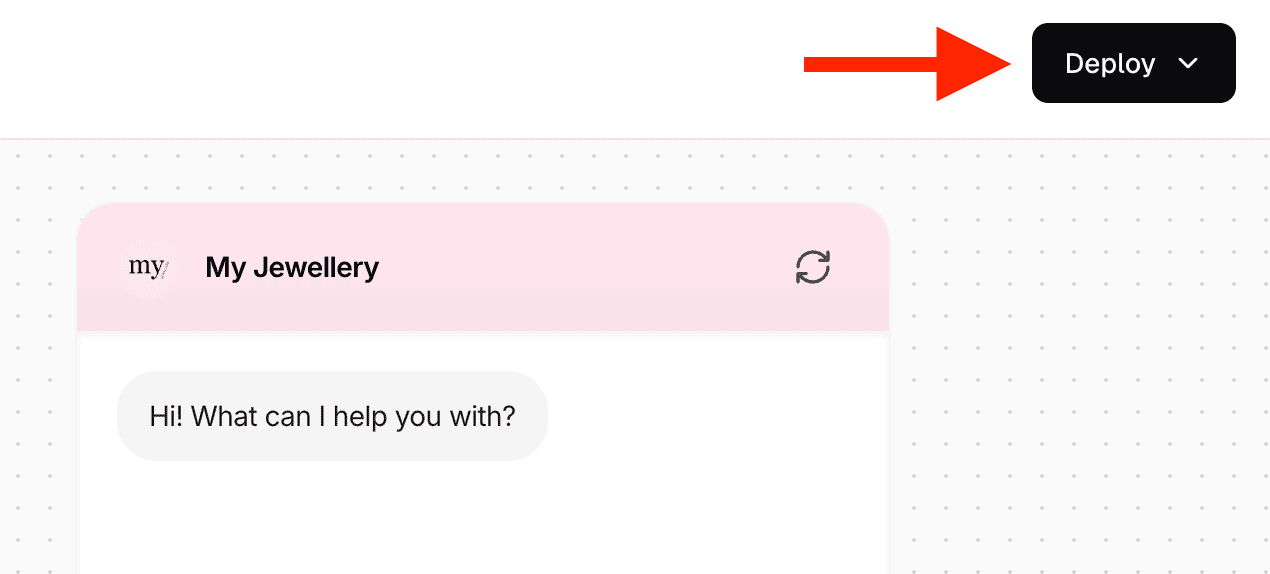
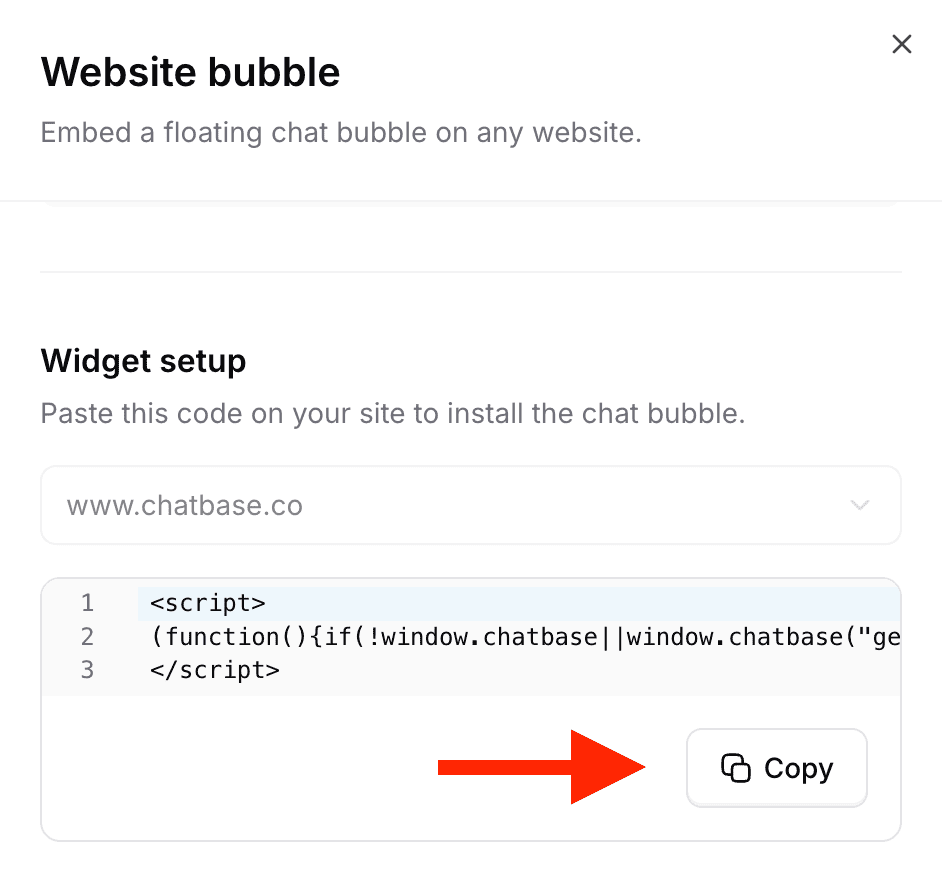
Then, you get the code from Chatbase to add it to your website. Click on Copy to copy the code:
Next, I will show you how you can add this to a WordPress website.
But you can add this to any website, whether you’re using Shopify, Wix, or Webflow. Or anything else really.
So in WordPress, you can add the plugin WP Code to add the Chatbase script to your website.
Once you have the plugin, you can click on Add New:

Choose for Add Your Custom Code:

And select the HTML Snippet:

Under “Code Preview”, you can paste the script code from Chatbase:

Then, click on Active and Save Snippet in the top-right corner:

Now, the Chatbase chatbot is working on my website!

What is the best chatbot to use with Facebook messenger ads?
Hey David! I would recommend using ManyChat.