
By Joren Wouters • Updated on
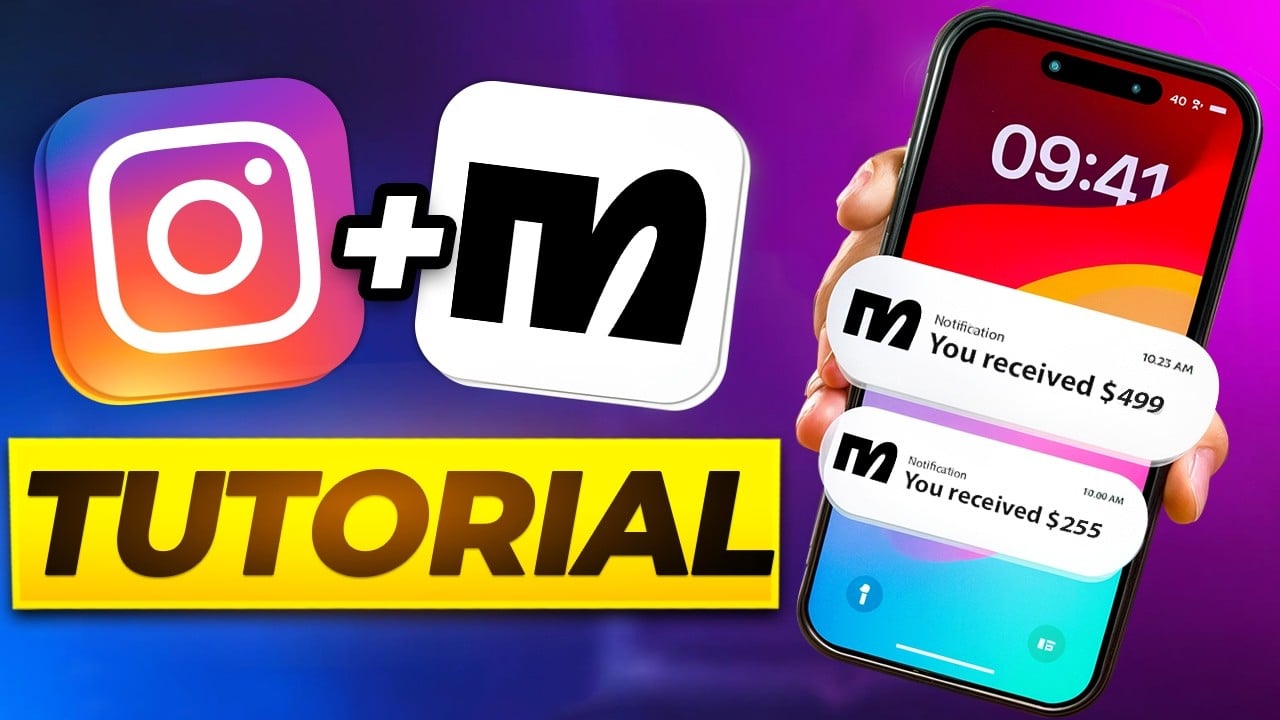
Manychat is one of the best Instagram chatbots that automates your DMs, story replies, and post comments.

Every time someone messages you, replies to your stories, or comments on your Instagram post, you can respond automatically without sending a manual DM (I go through every feature in detail in my full Manychat review).
This boosts engagement, expands your reach and generates leads from Instagram—on autopilot.
The best part? 99% of Instagram accounts aren’t using Manychat to grow.
By using it, you’ll gain a competitive advantage over most accounts.
In fact, I’m using Manychat all the time to turn strangers into leads & customers. If you want to see how, read this post: 5 Instagram Chatbot Examples
What does Manychat pricing look like?
Manychat offers both a free plan and multiple paid plans (starting at $17/month):
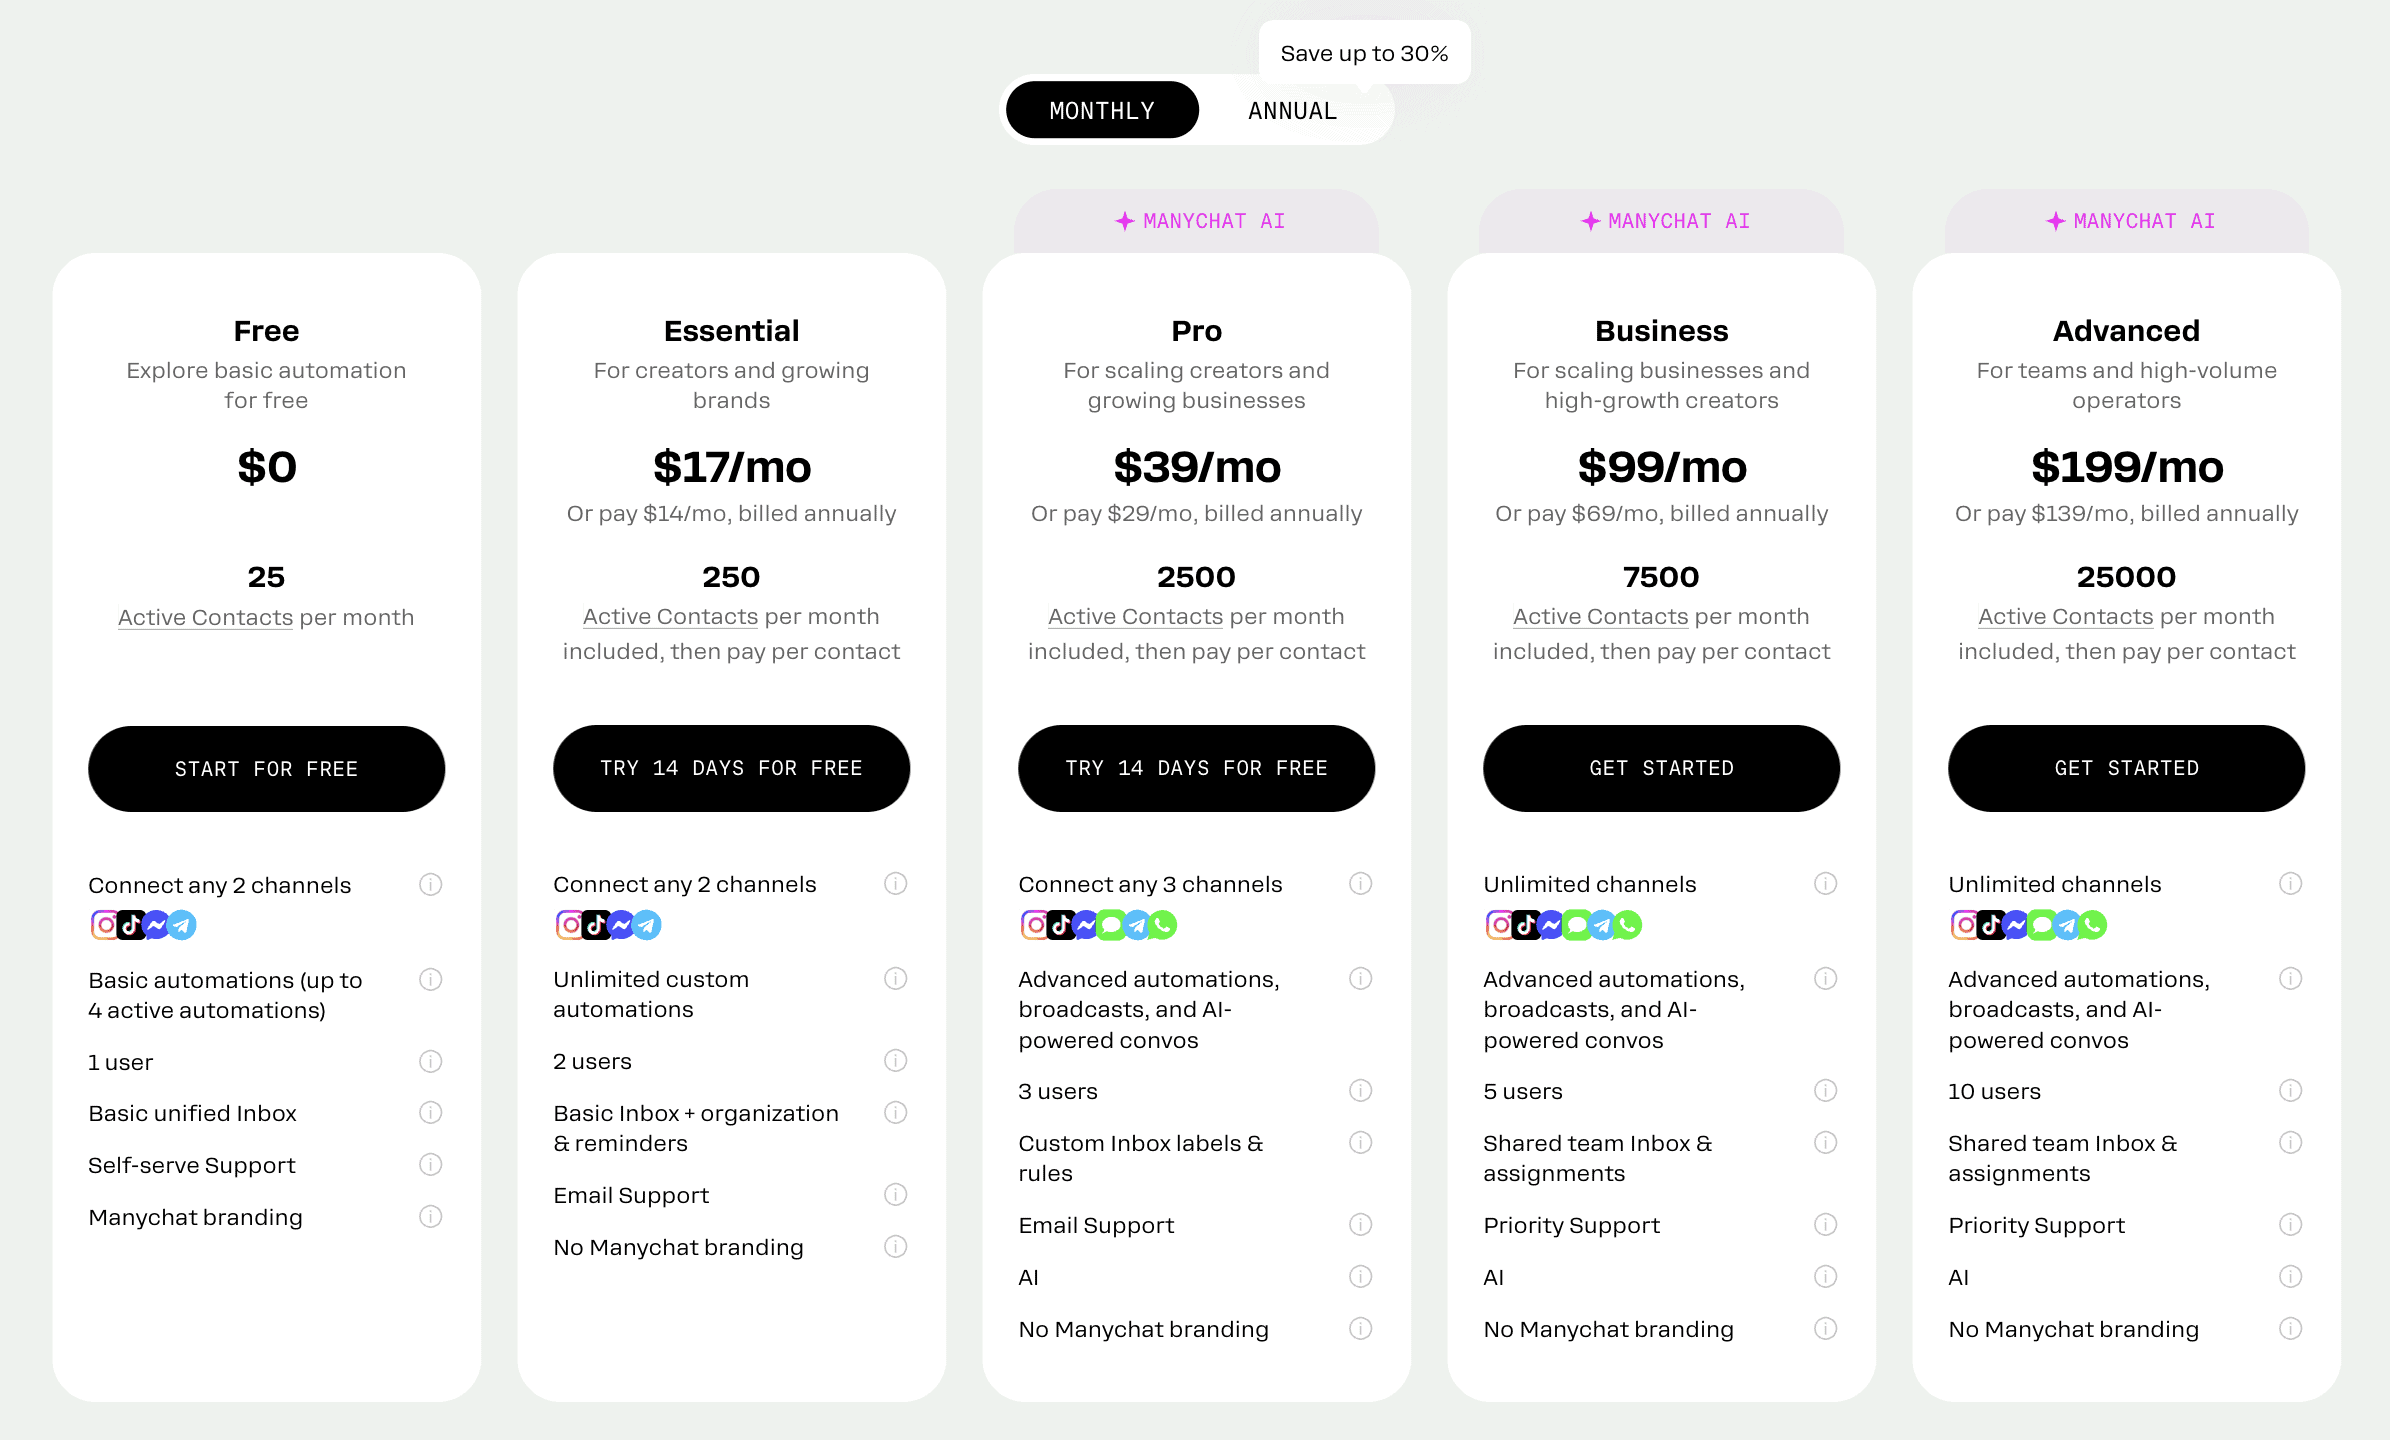
- Free plan: Up to 25 contacts. Great for testing but missing key features (like user input + integrations)
- Essential plan (from $17/month): Gives you unlimited automations. You get 250 contacts, and you can connect any 2 channels (but not WhatsApp)
Check Manychat’s full pricing here.
How to Create a Free Manychat Account
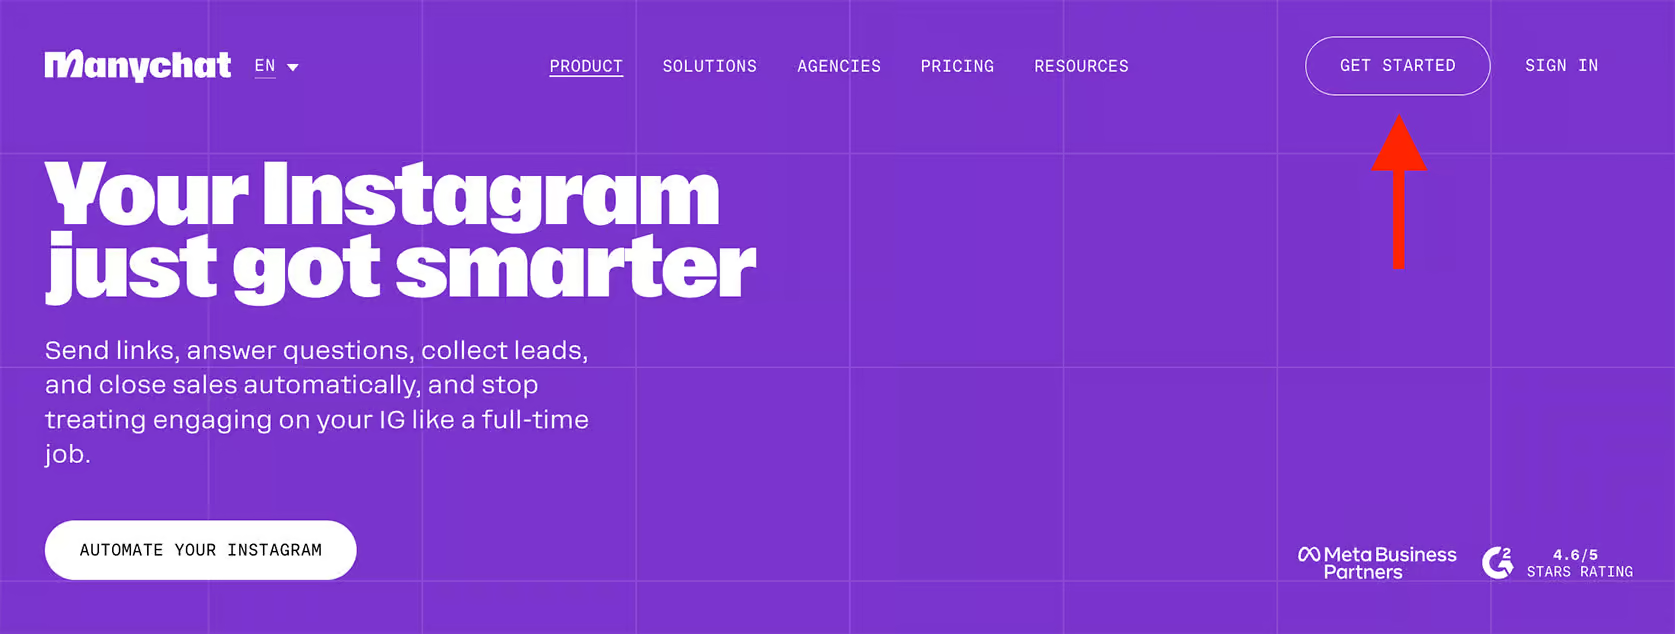
To get started, click below to create a free Manychat account (a discount code will appear on click):
Click on Get Started for Free:
And select Instagram:

And I have a separate tutorial explaining step-by-step how to connect your Instagram account to Manychat. You can find it here:
I recommend checking it out after reading this post, because you’ll need to follow a few steps to connect your accounts correctly.
Once you have done that, you’ll be logged into Manychat.
4 Key Features of Manychat
Before creating your first chat funnel, here are the 4 key features of Manychat you should know in 2026.
Manychat Contacts
Contacts are all the people who interact with your Manychat automations. In the contacts tab, you’ll see an overview of all your contacts across channels:

Here, you can search for specific contacts, filter on specific fields and view full contact profiles:

Manychat Fields
Fields allow you to collect and store information from your contacts. Manychat has unlimited custom fields as well as built-in fields like first name, last name and email.
With fields, you can:
- Ask contacts questions
- Store their answers
- Use this data in chat funnels or share it with other platforms like your email marketing software
All your fields are visible in Settings:

Manychat Automation
Automation is where everything comes together. When someone comments or sends a DM, Manychat instantly kicks off an automated conversation.
Pro Tip: Add variations to your automated replies to avoid looking spammy and boost engagement.

You’ll spend most of your time in this section setting up your flows.
Manychat Live Chat
In Manychat, you have two types of conversations:
- Closed Conversations: handled by automations
- Open Conversations: Managed by you or your team
By using Live Chat, you can take over the conversations from automations and then hand back control when you are finished:

Now you know the 4 key features of Manychat, let’s set the right settings of your Manychat account.
How to Set Up Manychat on Instagram (Settings)
In Settings, click on Live Chat Behavior and set your behavior to Conversation should be opened explicitly:

This ensures conversations are closed by default, allowing automations to handle them. Then, you or your team can open a conversation when needed.
When someone on your team takes over, Manychat can automatically pause automations for 24 hours. It prevents them from interrupting the human-managed chat. Also, it keeps compliant with Instagram DM rules.
How to Create Manychat Instagram DM Automation
Let’s start building our first Instagram DM automation with Manychat. It all starts by auto-replying to Instagram comments, which is what pulls people into your DMs.
In this Manychat tutorial, we’ll create a Lead Generation Funnel to give away a free e-book. In exchange, we’ll ask for the user’s first name and email address.
And then we will send this data to our email marketing platform to grow our email list.
We can do it in two simple steps:
Step 1: Add Comments and Keyword trigger in Manychat
In Manychat, click on Automation and choose New Automation:

There are many pre-built Manychat templates, but we’ll start from scratch to learn the setup process:

Each automation begins with a trigger, the event that starts the automation.
Click on New Trigger, select Instagram, and see all the available triggers:

I use two main triggers when using Manychat:
- User comments on a post or reel
- User sends a message with a keyword
Let’s get started with User comments on your Post or Reel. Anytime someone comments on a post or reel with a specific word, we can automatically start an Instagram DM conversation:

We will set it to Any post or reel, so we can reuse this automation across all posts and reels:

Next, we will define the trigger words. We’ll trigger this automation whenever someone comments with GUIDE. You can also add common misspellings, like GUID and GIUD:

And then we can also set up a public reply. This is the automatic comment reply in the comment section.
Since people are commenting, you’ll get more engagement, and by replying with another comment, you boost it even further.
In this message, you should do two things:
- Excite them about the free guide
- Direct them to their Instagram DM
You can add multiple variations, so Manychat picks randomly and it avoids looking spammy on Instagram.
If we’re giving a free ebook on building muscle, then we can add these comment replies:

Now, we’ll automatically reply to each comment with GUIDE on Instagram.
We’ll also set up a second trigger for User sends a message with a keyword:

And click on Detect Specific Word in A Message:

So anytime someone DMs you with the word GUIDE, we automatically start the conversation:

And again, add some misspellings here.
Step 2: Set up your Instagram DM Automation
Now we’ve set up our triggers, we can define the first message in our automation. This message will go to their Instagram DM.
In this message, confirm the interest in the ebook:
Are you ready to gain more muscle and take your body to the next level?
Just click the button below and I’ll send over my free guide “8 Simple Exercises To Gain More Muscle” 💪
P.S. Ensure this message is set to “Send as Comment Reply”. Otherwise, it will not trigger if someone comments on your post.

And add a quick reply with:
✅ YES, send it over!

In Manychat, a quick reply is a button that users can click. When clicked, we’ll automatically send them another message.
In our next message, we emphasize it only takes two quick steps to get access. And to make it more conversational, we will also add a delay after that message.

Now, let’s collect information from the contact. Since we’re giving something away in exchange for their info, we’ll ask for their first name and email.
So we can start by asking their first name. To collect user input, click on Data Collection in Manychat:

And ask for their first name by saying:
What is your first name?
Just type in your first name below 👇

Here, ensure that:
- The Reply Type is First Name
- The Data Collection expires in 23 hours
Then, scroll down and remove the Skip buton text, so people can’t skip the question:

Then, connect this message to another block, so we send another message once they gave their first name:

In this message, we can greet them with the first name they just entered.
So we will say:
Nice to meet you, {{first_name}} 👋🏼

Then, we will add another Data Collection element to ask for their email:
And what email do you want your free guide sent to?
Just type in your email below 👇

Here, set the Reply Type to Email, so Manychat will automatically verify if the entered text is a valid email.
If it’s not, it will send the retry message.

And again, remove the Skip button text, so people can’t skip this question.
Once they provide their email, we can deliver the guide in the last message:
You’re all set, {{first_name}}!
Can’t wait for you to row your muscle using my 8 simple exercises 💪
Just click the button below to get instant access 👇
And then add a button labeled:
💪 Access My Guide!
We set this button to Open website, so it takes them to your guide.

And that’s it! At this point, your automation should look like this:

Manychat Integrations: Build Your Email List Automatically
Manychat directly integrates with email platforms like ActiveCampaign and Converkit. You can use these to automatically add emails from Manychat to your email list.
Go to Settings > Integrations, to see the available direct integrations of Manychat:

Here, I’ve set up the Mailchimp integration:

Then inside the Instagram DM Automation, we can add an action, select Mailchimp and add someone to the list in Mailchimp:

Now, whenever someone shares their email in ManyChat, it’s automatically added to your Mailchimp list.
Free Manychat Template
And that’s it! That’s how you get started with Manychat in 2026.
As promised, here’s my free Manychat template to help you get started right now 👇
Next Steps
And this was just one type of funnel you could use. But I actually have another video on my Youtube account where I explain the 3 Chat Funnels you should use in 2026.

So if you want to get started with more funnels, I highly recommend checking out that video.
What I showed today is just one simple funnel. With Manychat, you can build entire systems that turn Instagram into a lead engine running 24/7.
So if you want to get more familiar with Manychat and know how you can use all the features, I actually have a Manychat beginner course for Instagram on my website that you can check out.
As always, if you have any questions on using Manychat or automating your Instagram DMs, please leave a comment below. I will reply as soon as possible!